How I Scaled Manufacturing for PMW3610 Breakout Boards
When I first built my ergonomic keyboard, I wanted to include the trackball, but no one sold the optical sensor module. What started as a personal project requirement became a small business - manufacturing PMW3610 breakout boards for other makers in the custom keyboard community.
For the first three batches, I hand-soldered every board. Each one required carefully soldering 16 pins on the PMW3610 module and attaching the LM18-LSI lens - delicate work that took significant time and attention. This approach wasn't sustainable.
That's when PCBWay reached out. They found my ergonomic keyboard project on GitHub and offered to sponsor PCB manufacturing in exchange for putting their logo on the board. The logo is 6mm x 2mm (in American: a quarter inch by seven-tenths of an inch). Comically tiny. Seemed like a fair deal to me! I saw this as the perfect opportunity to scale production. Instead of just getting a few prototype boards, I proposed something more ambitious: a larger production run of fully-assembled boards that I could simply package and sell.
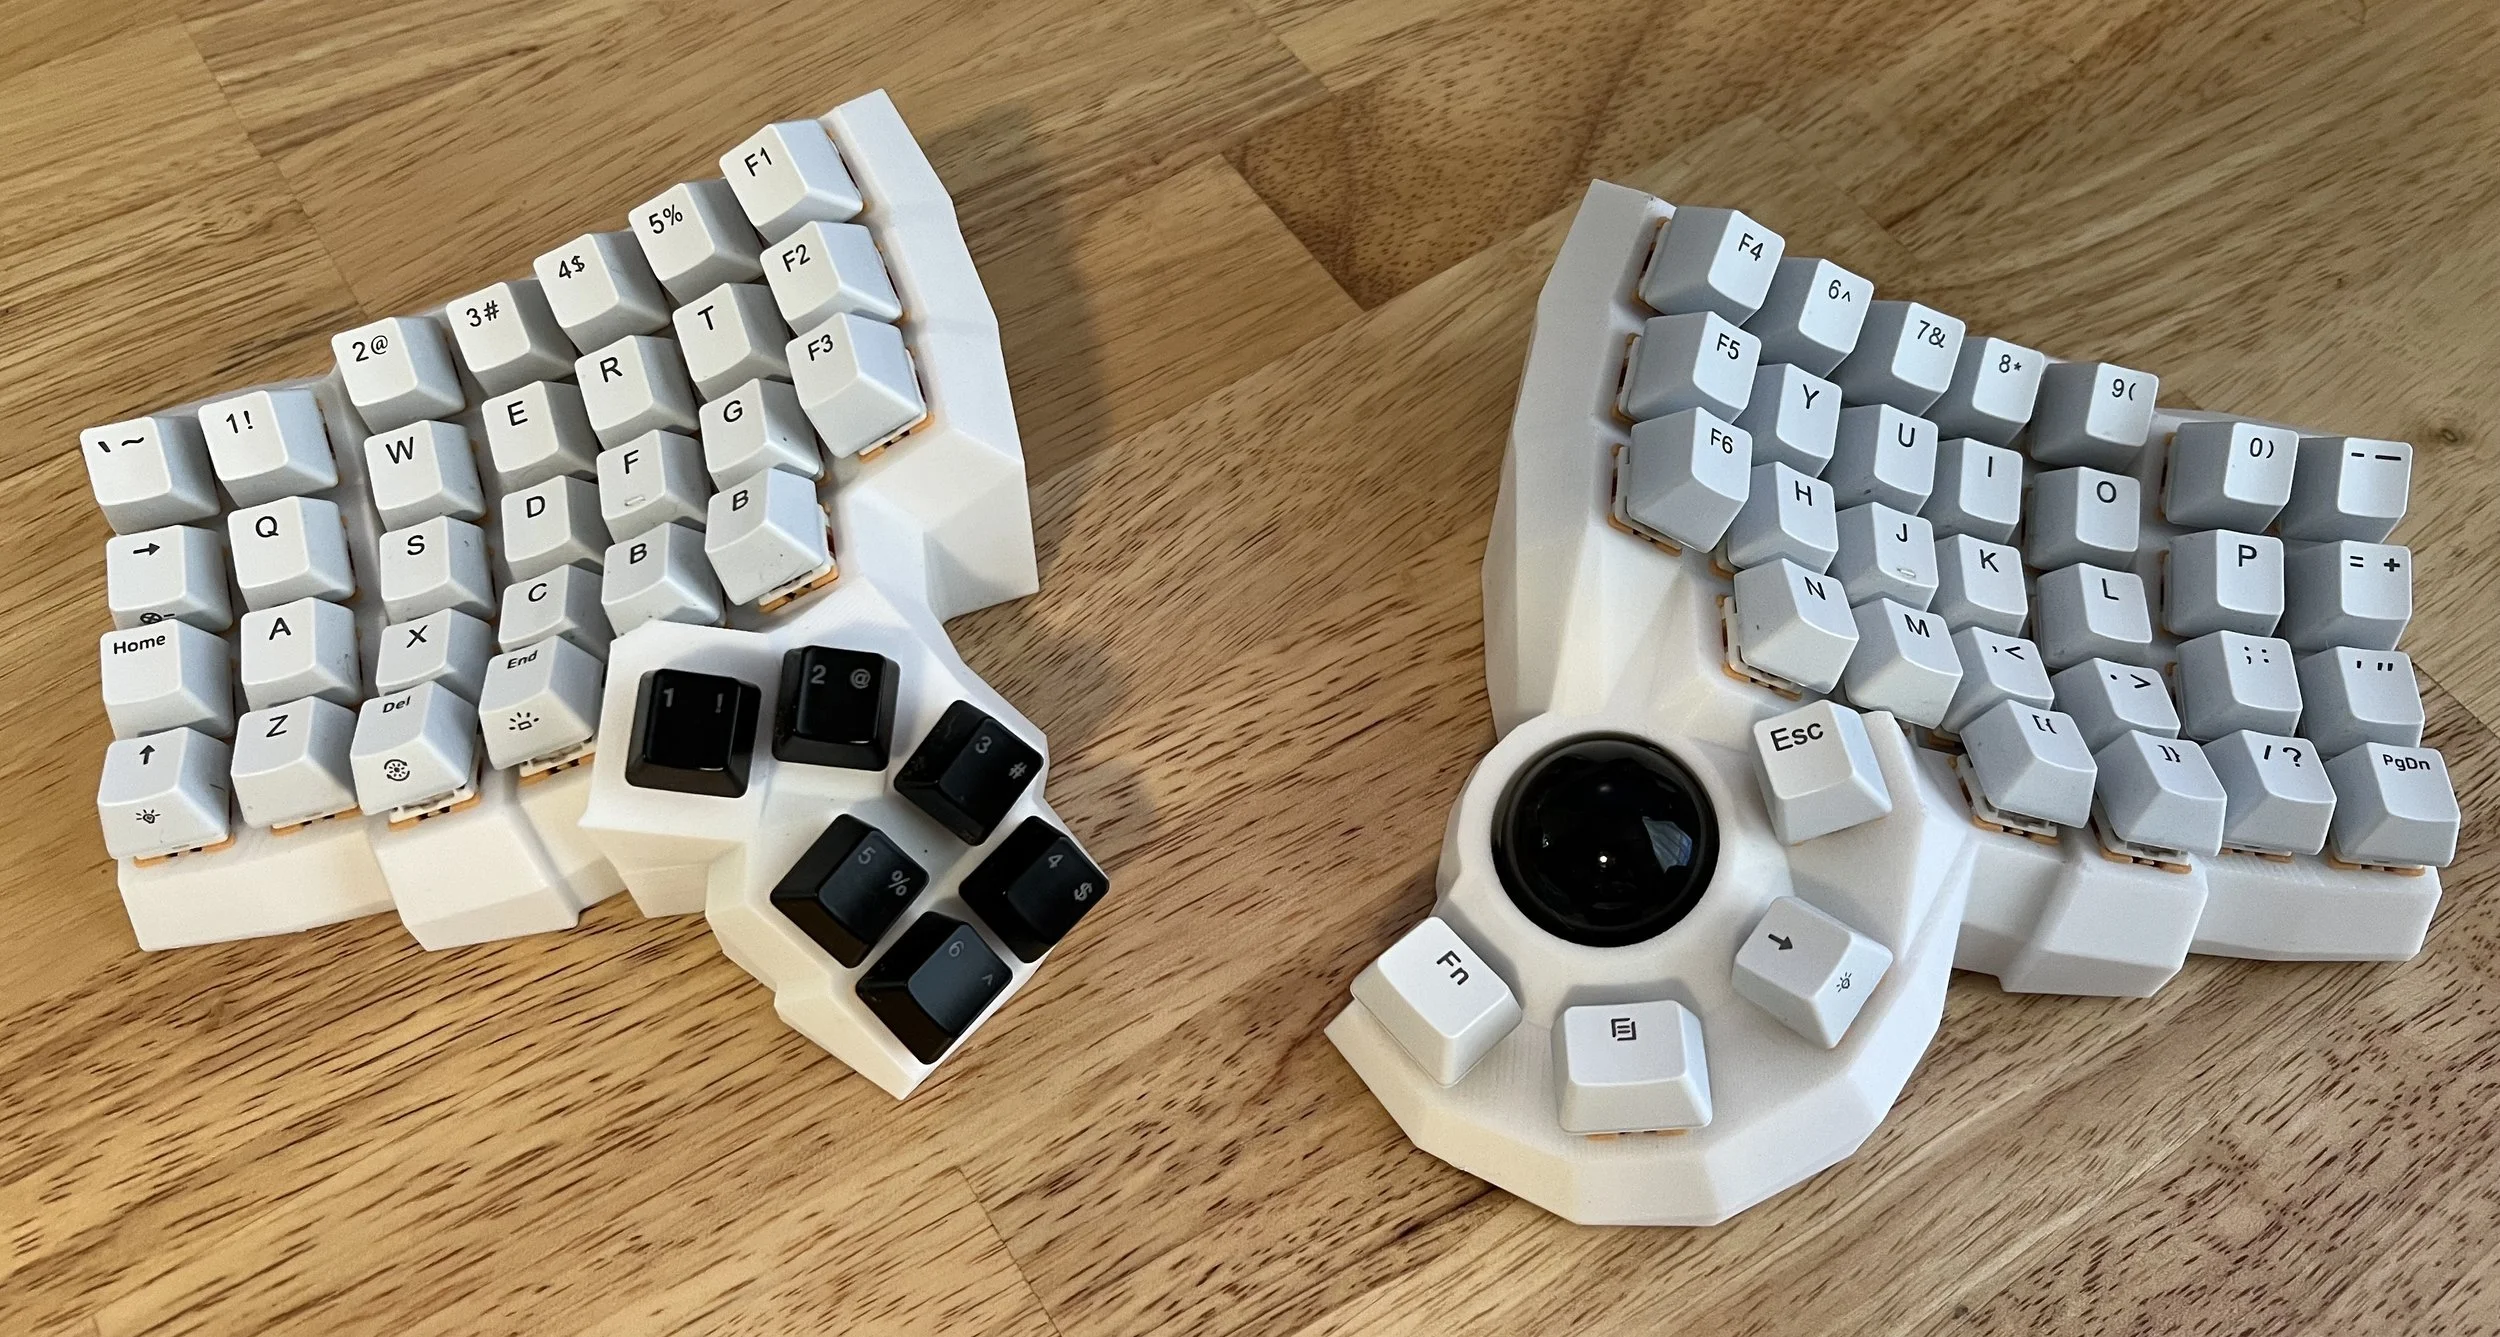
Ergonomic Keyboard generated by @rianadon’s Cosmos Keyboard Configurator. The originator of the journey.
The Parts
The first step to scaling manufacturing is outsourcing the tedious process of PCB Assembly (PCBA). Luckily PCBWay offered this service with optional hand-assembly, meaning they could handle the tedious soldering work I'd been doing plus the odd tasks of pulling off kapton tape and press-fitting the lenses. More on that later.
One challenge emerged immediately: not every part is available in the fabricator's part library. In my case, the PMW3610 modules and LM18 lenses needed to be sourced by me and sent to the fabricator.
This isn't actually such a bad thing. There's a smart approach that saved me money over my traditional at-home hand-soldering manufacturing.
I ordered the PMW3610 modules from my usual supplier and had them shipped directly to PCBWay's facility in China. PCBWay used some modules for my assembly order, then forwarded the remaining modules back to me along with my finished boards.
Normally I'd order the PMW3610 modules from China → United States, AND separately the PCBs from China → United States. That's two international shipment fees, and two $17 (completely unreasonably priced) tariff handling fees by UPS/FedEx.
This parts forwarding approach is something I wish I'd thought about earlier. One consolidated shipment instead of multiple packages from different Chinese suppliers makes the whole process cleaner and more cost-effective.
All other parts were available from the PCBWay part library for fair prices.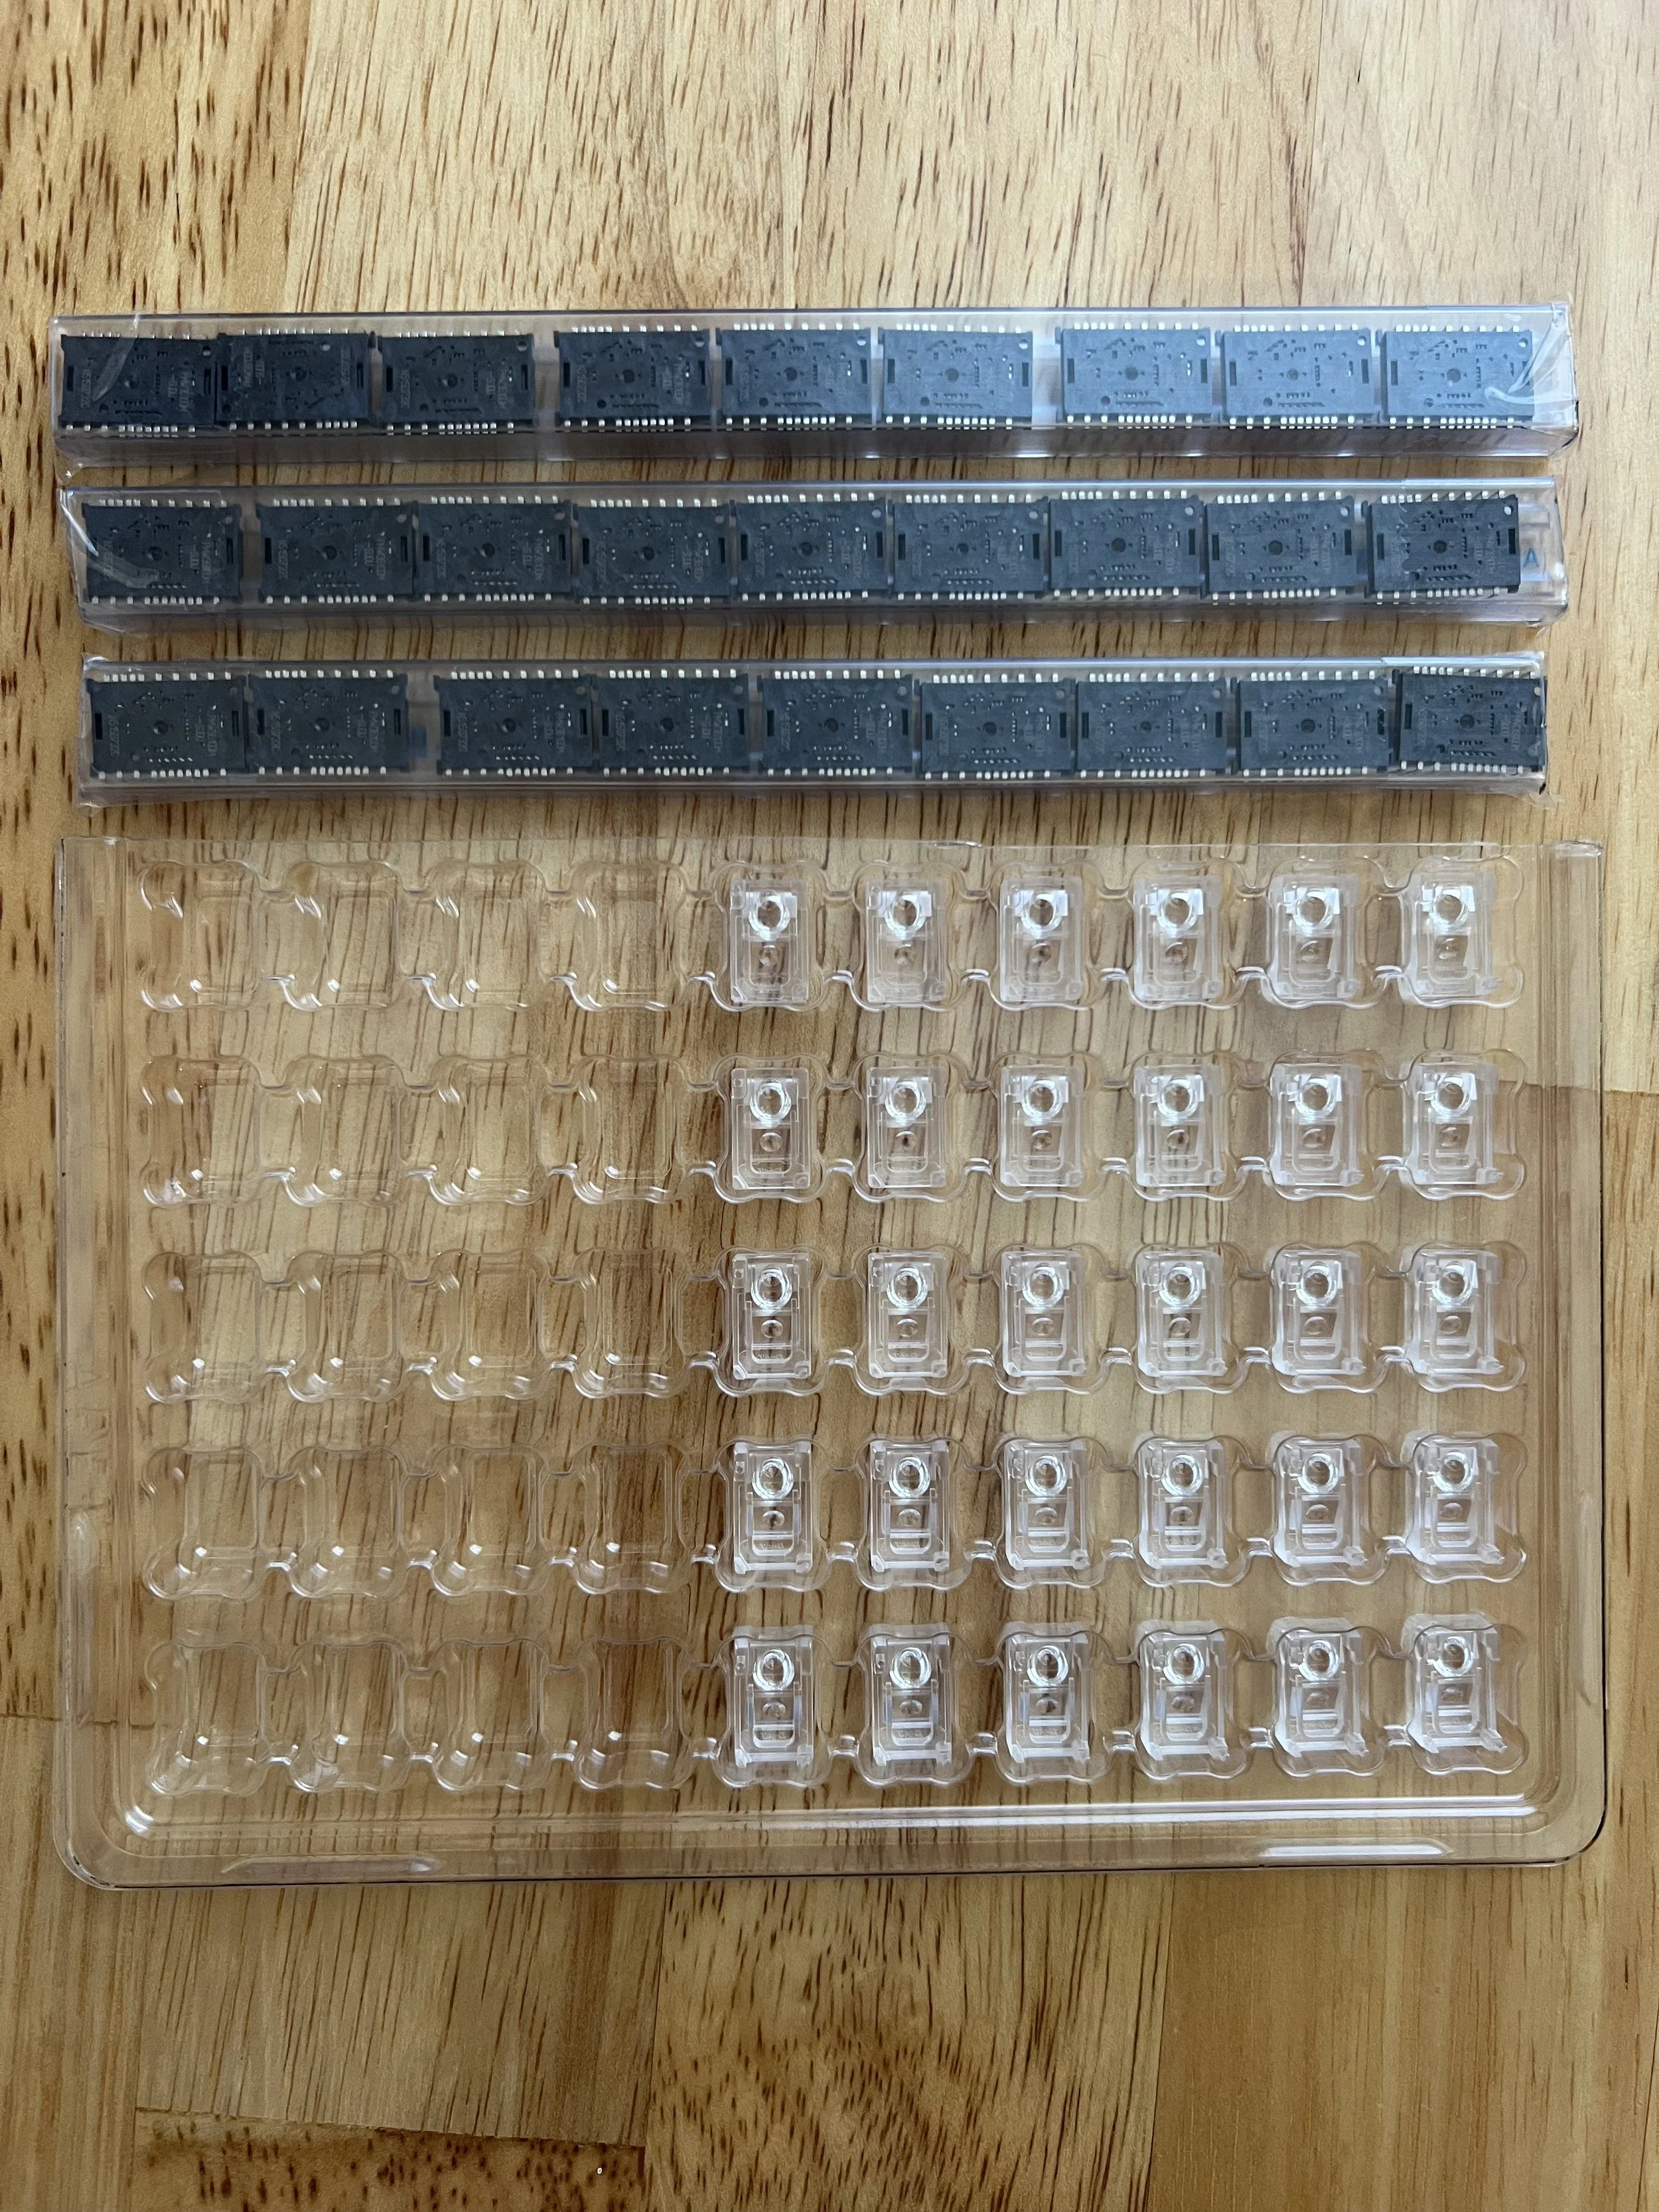
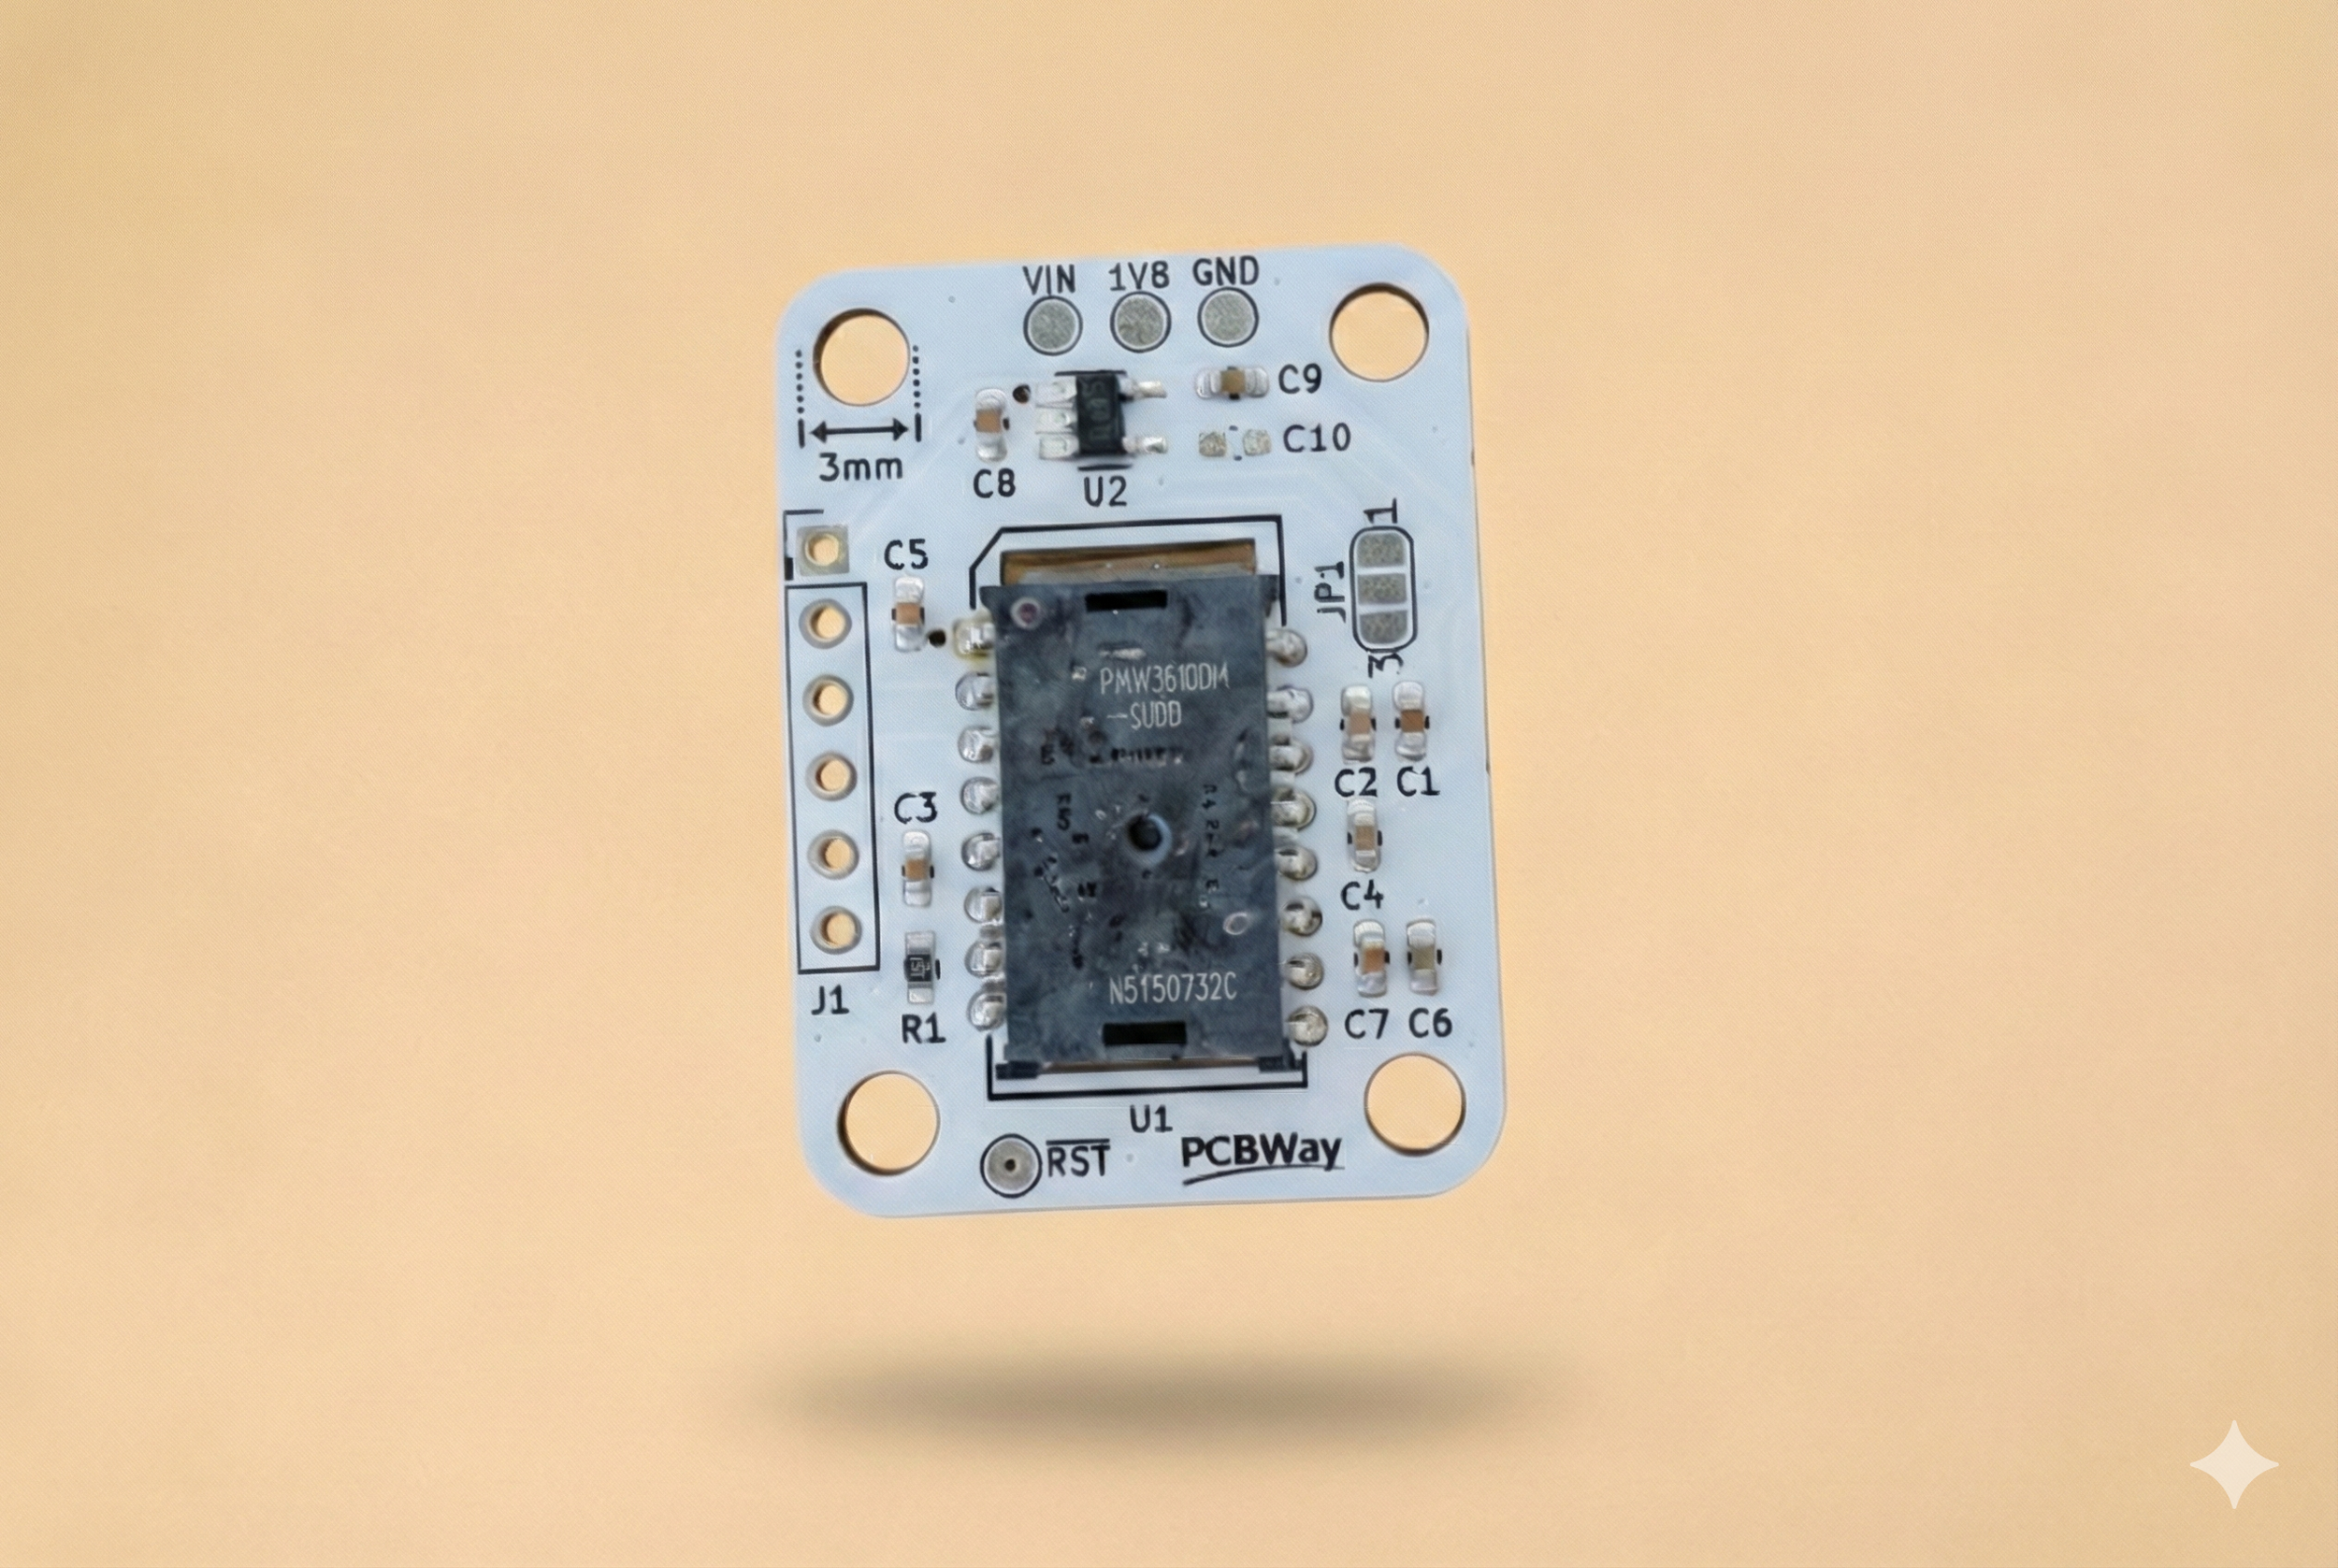
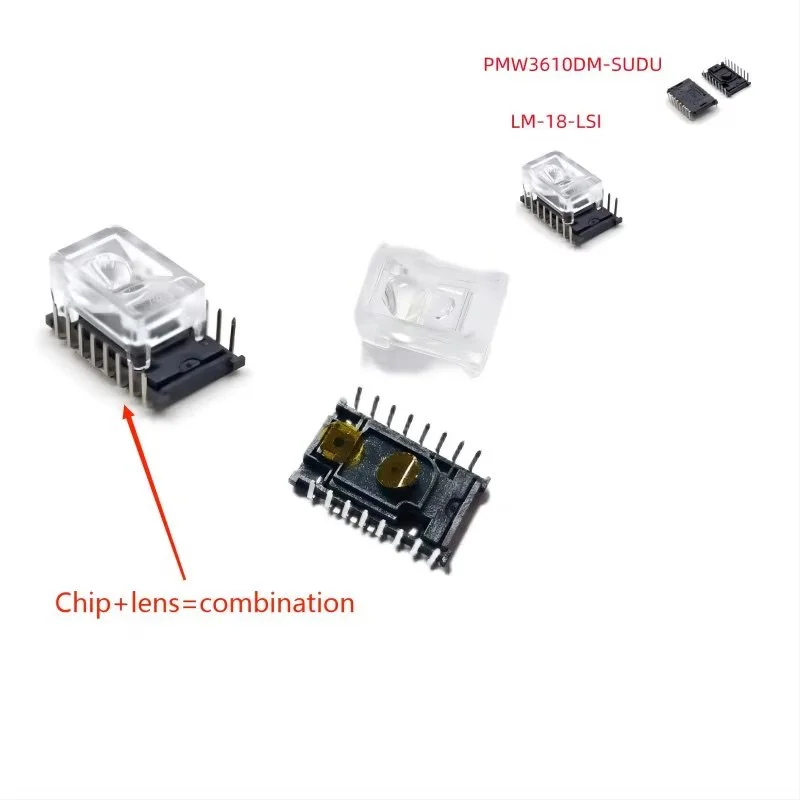
PMW3610 & LM18-LSI lens
Pre-Production Quality Control
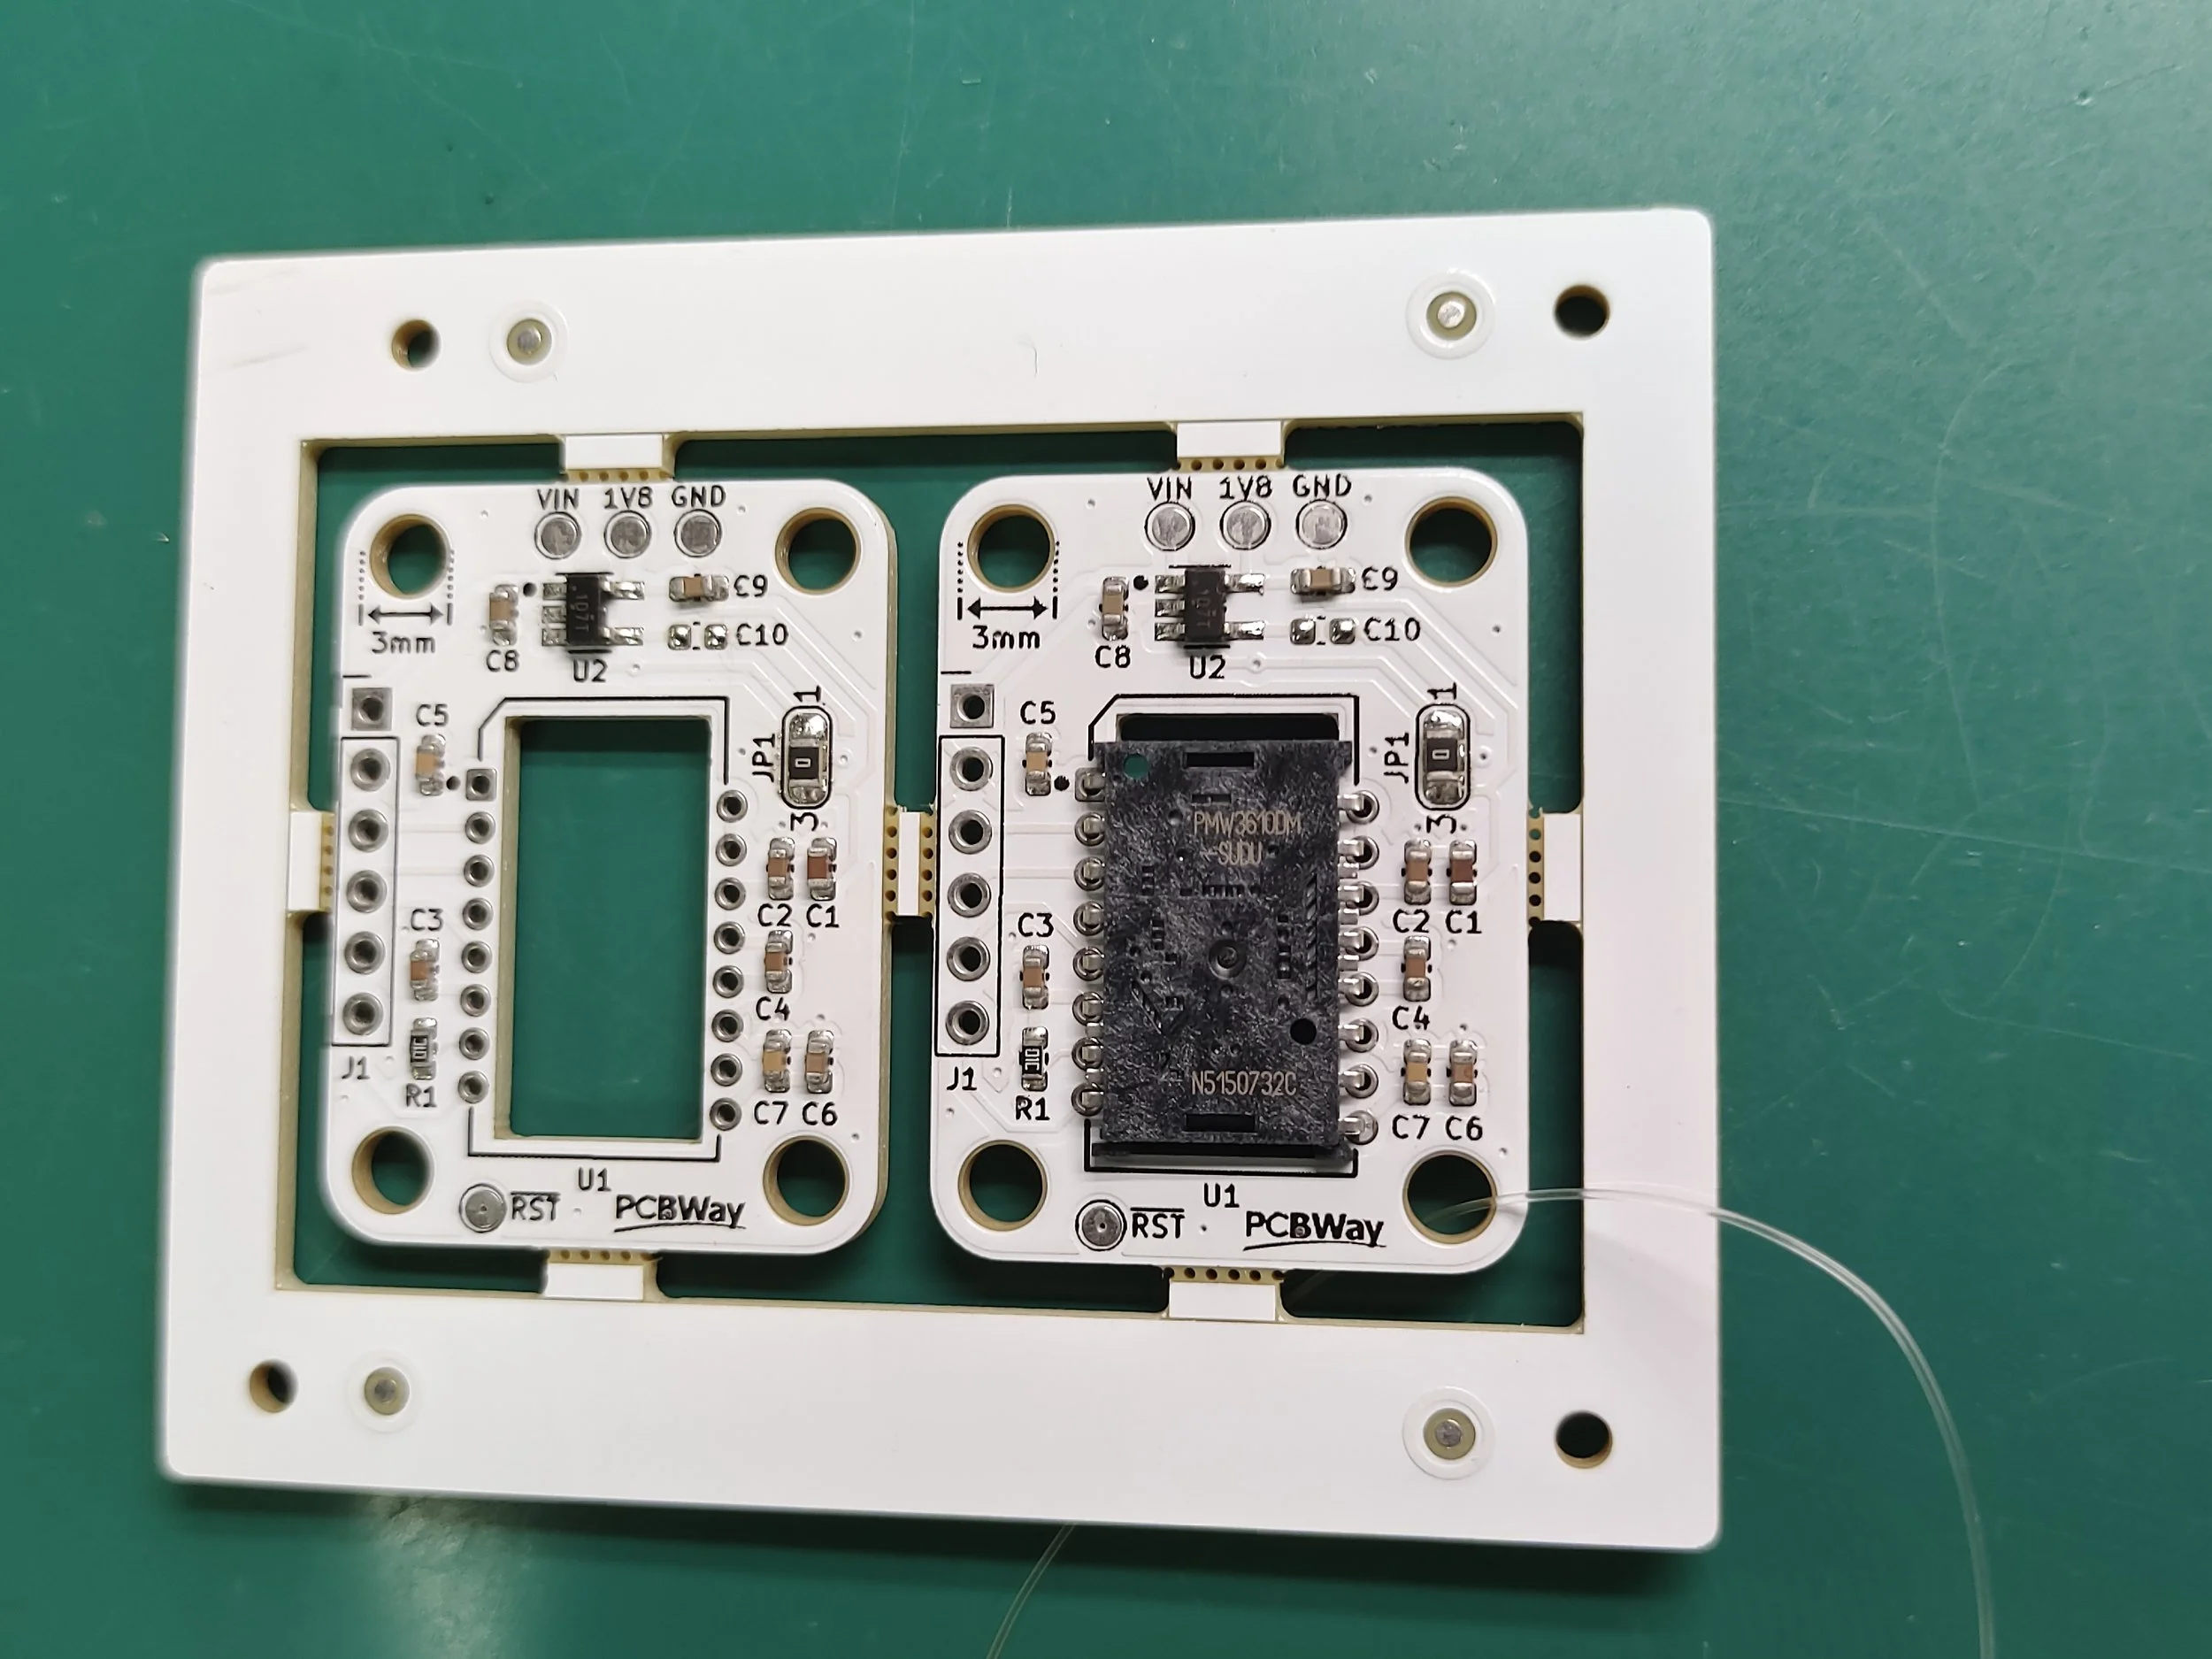
Quality control panel for verifying part placement, orientation and other potential issues.
If you’ve never had a PCB fabricated before, the process can be quite daunting. Before proceeding with the full production run, a test panel is partially assembled and sent for verification. This caught me off guard in the best way - I wasn't expecting this level of care for a relatively small quantity order.
We ended up doing two revision rounds using that same test board, which meant no wasted PCBs. I made a few small corrections to the assembly specifications, and they implemented the changes before moving forward. For someone doing PCBA for the first time, this iterative approach can provide incredible peace of mind.
The photo was used to confirm the component orientation on the physical board. Yes, you specify all of this in the ordering process with placement files and diagrams, but having them verify with an actual assembled board eliminated any chance of a costly mistake across all units. In my case, the 0 ohm resistor was incorrectly bridged between JP1 1-3 rather than 1-2. My position files were correct, but the chosen resistor size had too large of a footprint making it impossible to bridge the correct pads. This was quickly fixed with a substituted part (a purposeful solder bridge) before proceeding with full production.
Before all this they also analyzed the Gerber files and flagged a potential issue. They sent me a clear image with the defect highlighted in software - a minor design quirk that wouldn't affect functionality but technically violated some PCB design best practices. I chose to proceed with the design as-is since the "defect" didn't impact the board's performance, but it was reassuring to know their engineers were actually reviewing the files rather than blindly manufacturing whatever I submitted.
Assembly Instructions for a Funky Component
The PMW3610 module assembly presents a unique challenge: it requires installation from both sides of the PCB. The sensor module mounts on top, but the LM18 lens clicks into place from the bottom, sandwiching the PCB between them.
This was the original constraint that lead me to hand-assemble the PMW3610 (remember, 16 pins soldered & lens installation) in my first couple batches.
I sent PCBWay a diagram showing exactly how these components fit together, including the critical orientation of the lens and the yellow kapton tape removed. This is the kind of hand-assembly work that's typically difficult to outsource, but they handled it without issue and for a very fair price. Every board came back with the lens properly seated and oriented correctly.
This confirmed something important: PCBA services aren't just for standard SMD components. If you can clearly communicate the assembly requirements, even unusual manual assembly steps can be outsourced successfully.
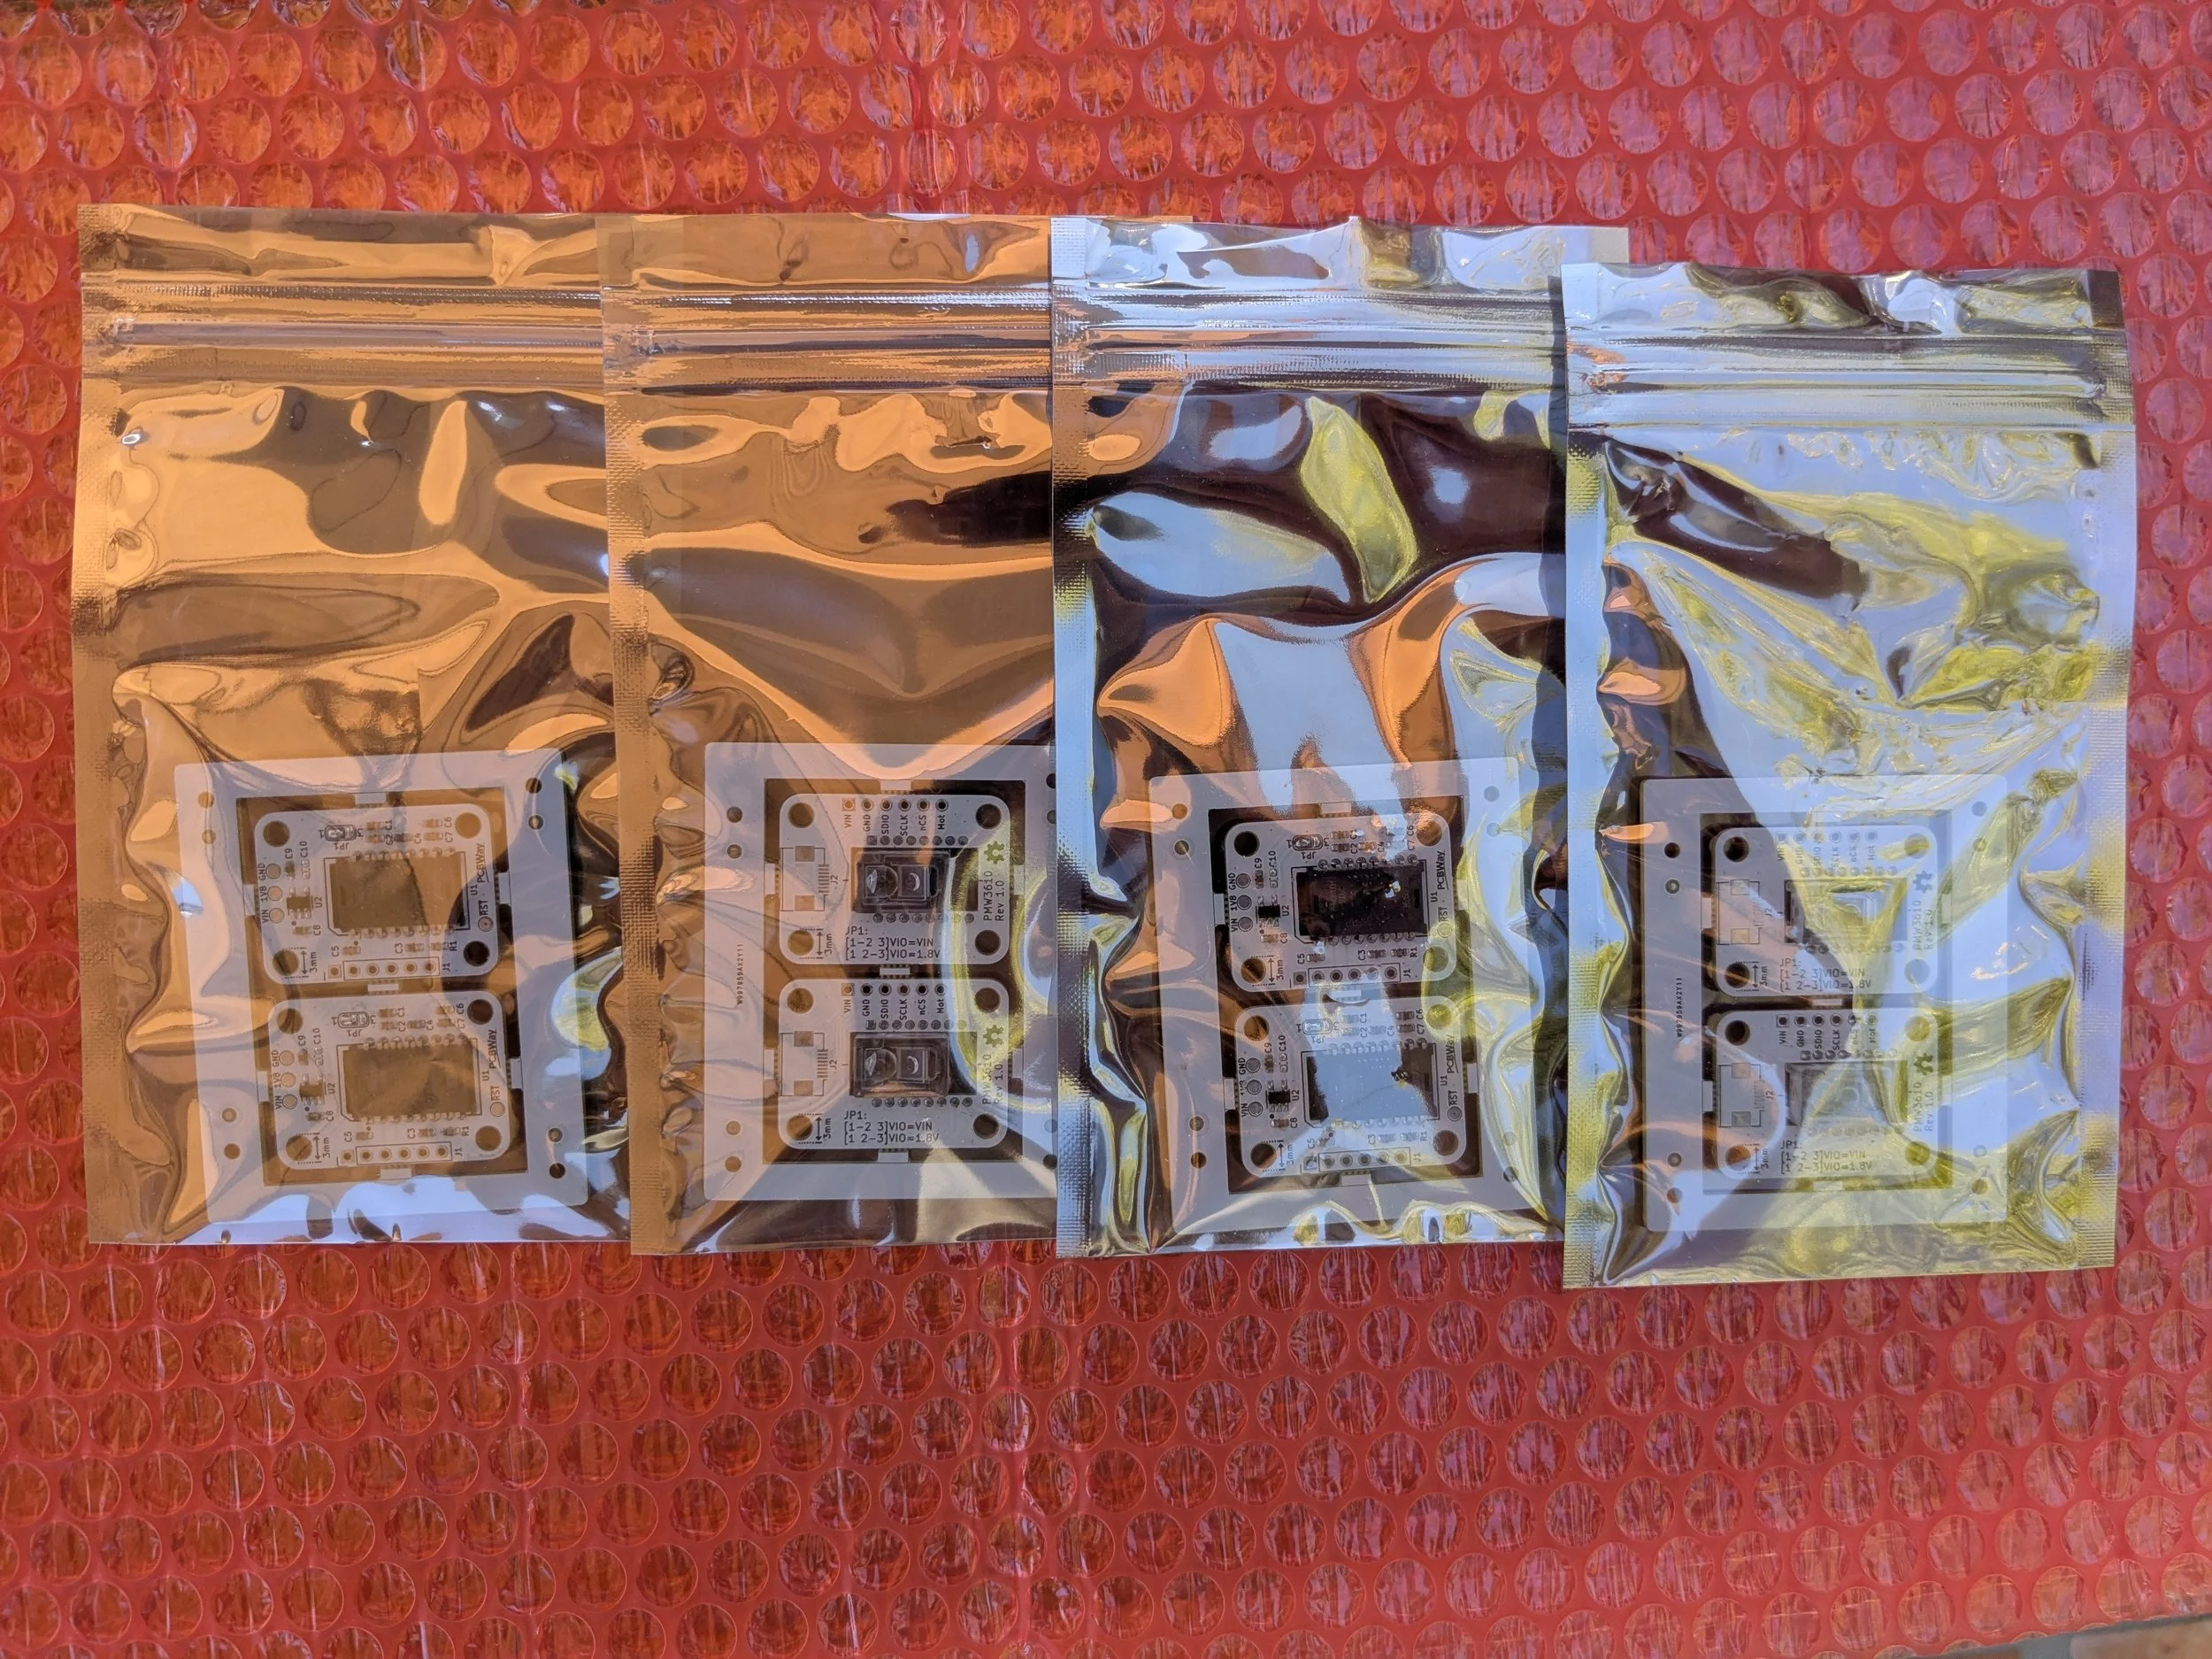
The Shipment Arrives
A few weeks later, a package from PCBWay arrived at my door in Arizona. The boards were well-packaged and survived international shipping without any damage.
Opening the package revealed the assembled boards in panels of two units, neatly packaged in anti-static bags. The purposefully leftover PMW3610 modules & lens were safely repackaged in the manufacturers shipping container. The 150x extra blank PCBs were bundled in sets of 50qty, air-tight with moisture wicking desiccant. And the comically large solder paste stencil was in a sturdy cardboard enclosure with thick paneling on both sides to avoid denting and bending.
I inspected the PCB assembly quality - and I’m pleased to say they looked perfect! I’m pretty decent at soldering, but these solder joints were uniform and high quality. And that quality spanned across all the boards equally. The PMW3610 modules were properly aligned, the kapton tape dust covers were removed, the lenses were seated correctly, and all the passive components were placed accurately. Having hand-soldered dozens of these boards myself, I could immediately see that the machine assembly was cleaner than what I could achieve manually.
This is the reality of PCBA services: they're not just faster, they're often more consistent than hand assembly, especially for fine-pitch components and repetitive work. And I saved roughly 10 minutes per board. Oh, and I did test each and every one manually, but that was probably a waste of time due to the precision of their PCB assembly.
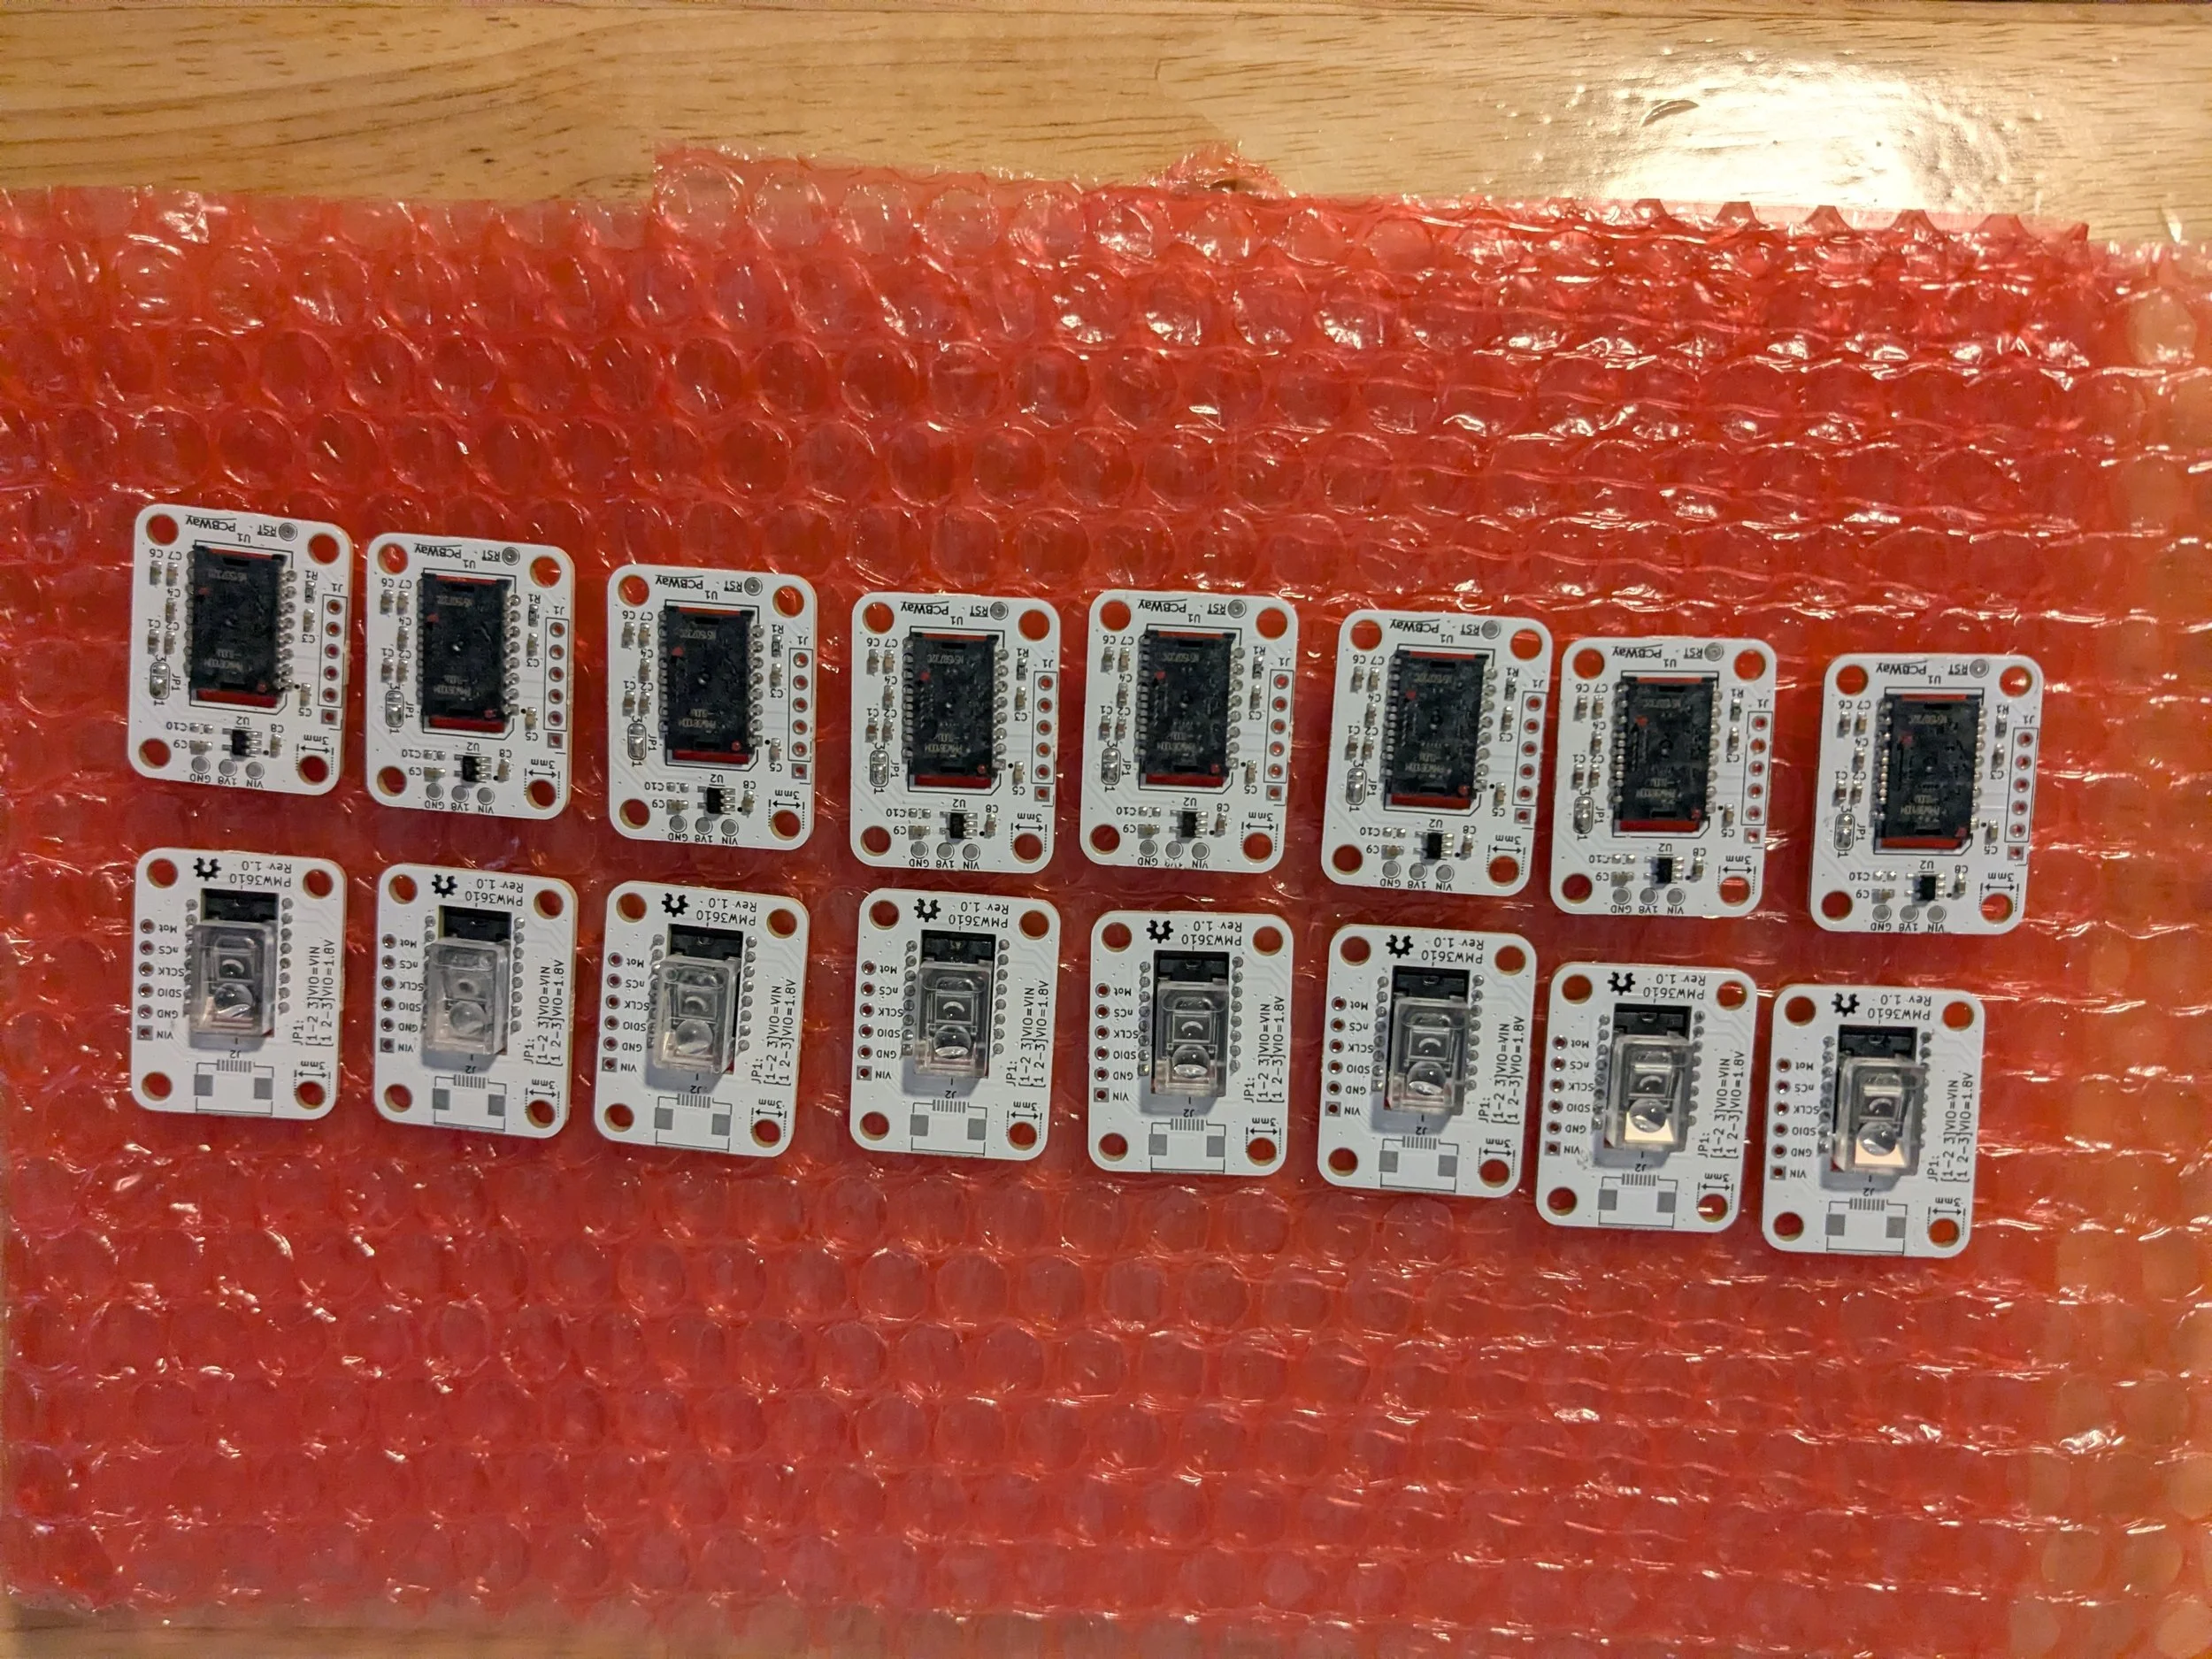
Four sets of the panelized PMW3610 modules, fully assembled and ready to use.
Depaneling and Final Preparation
The boards arrived in panels of two, which is standard for small boards - it's more efficient to manufacture multiple boards on a single panel. But before I could ship these to customers, I needed to separate them.
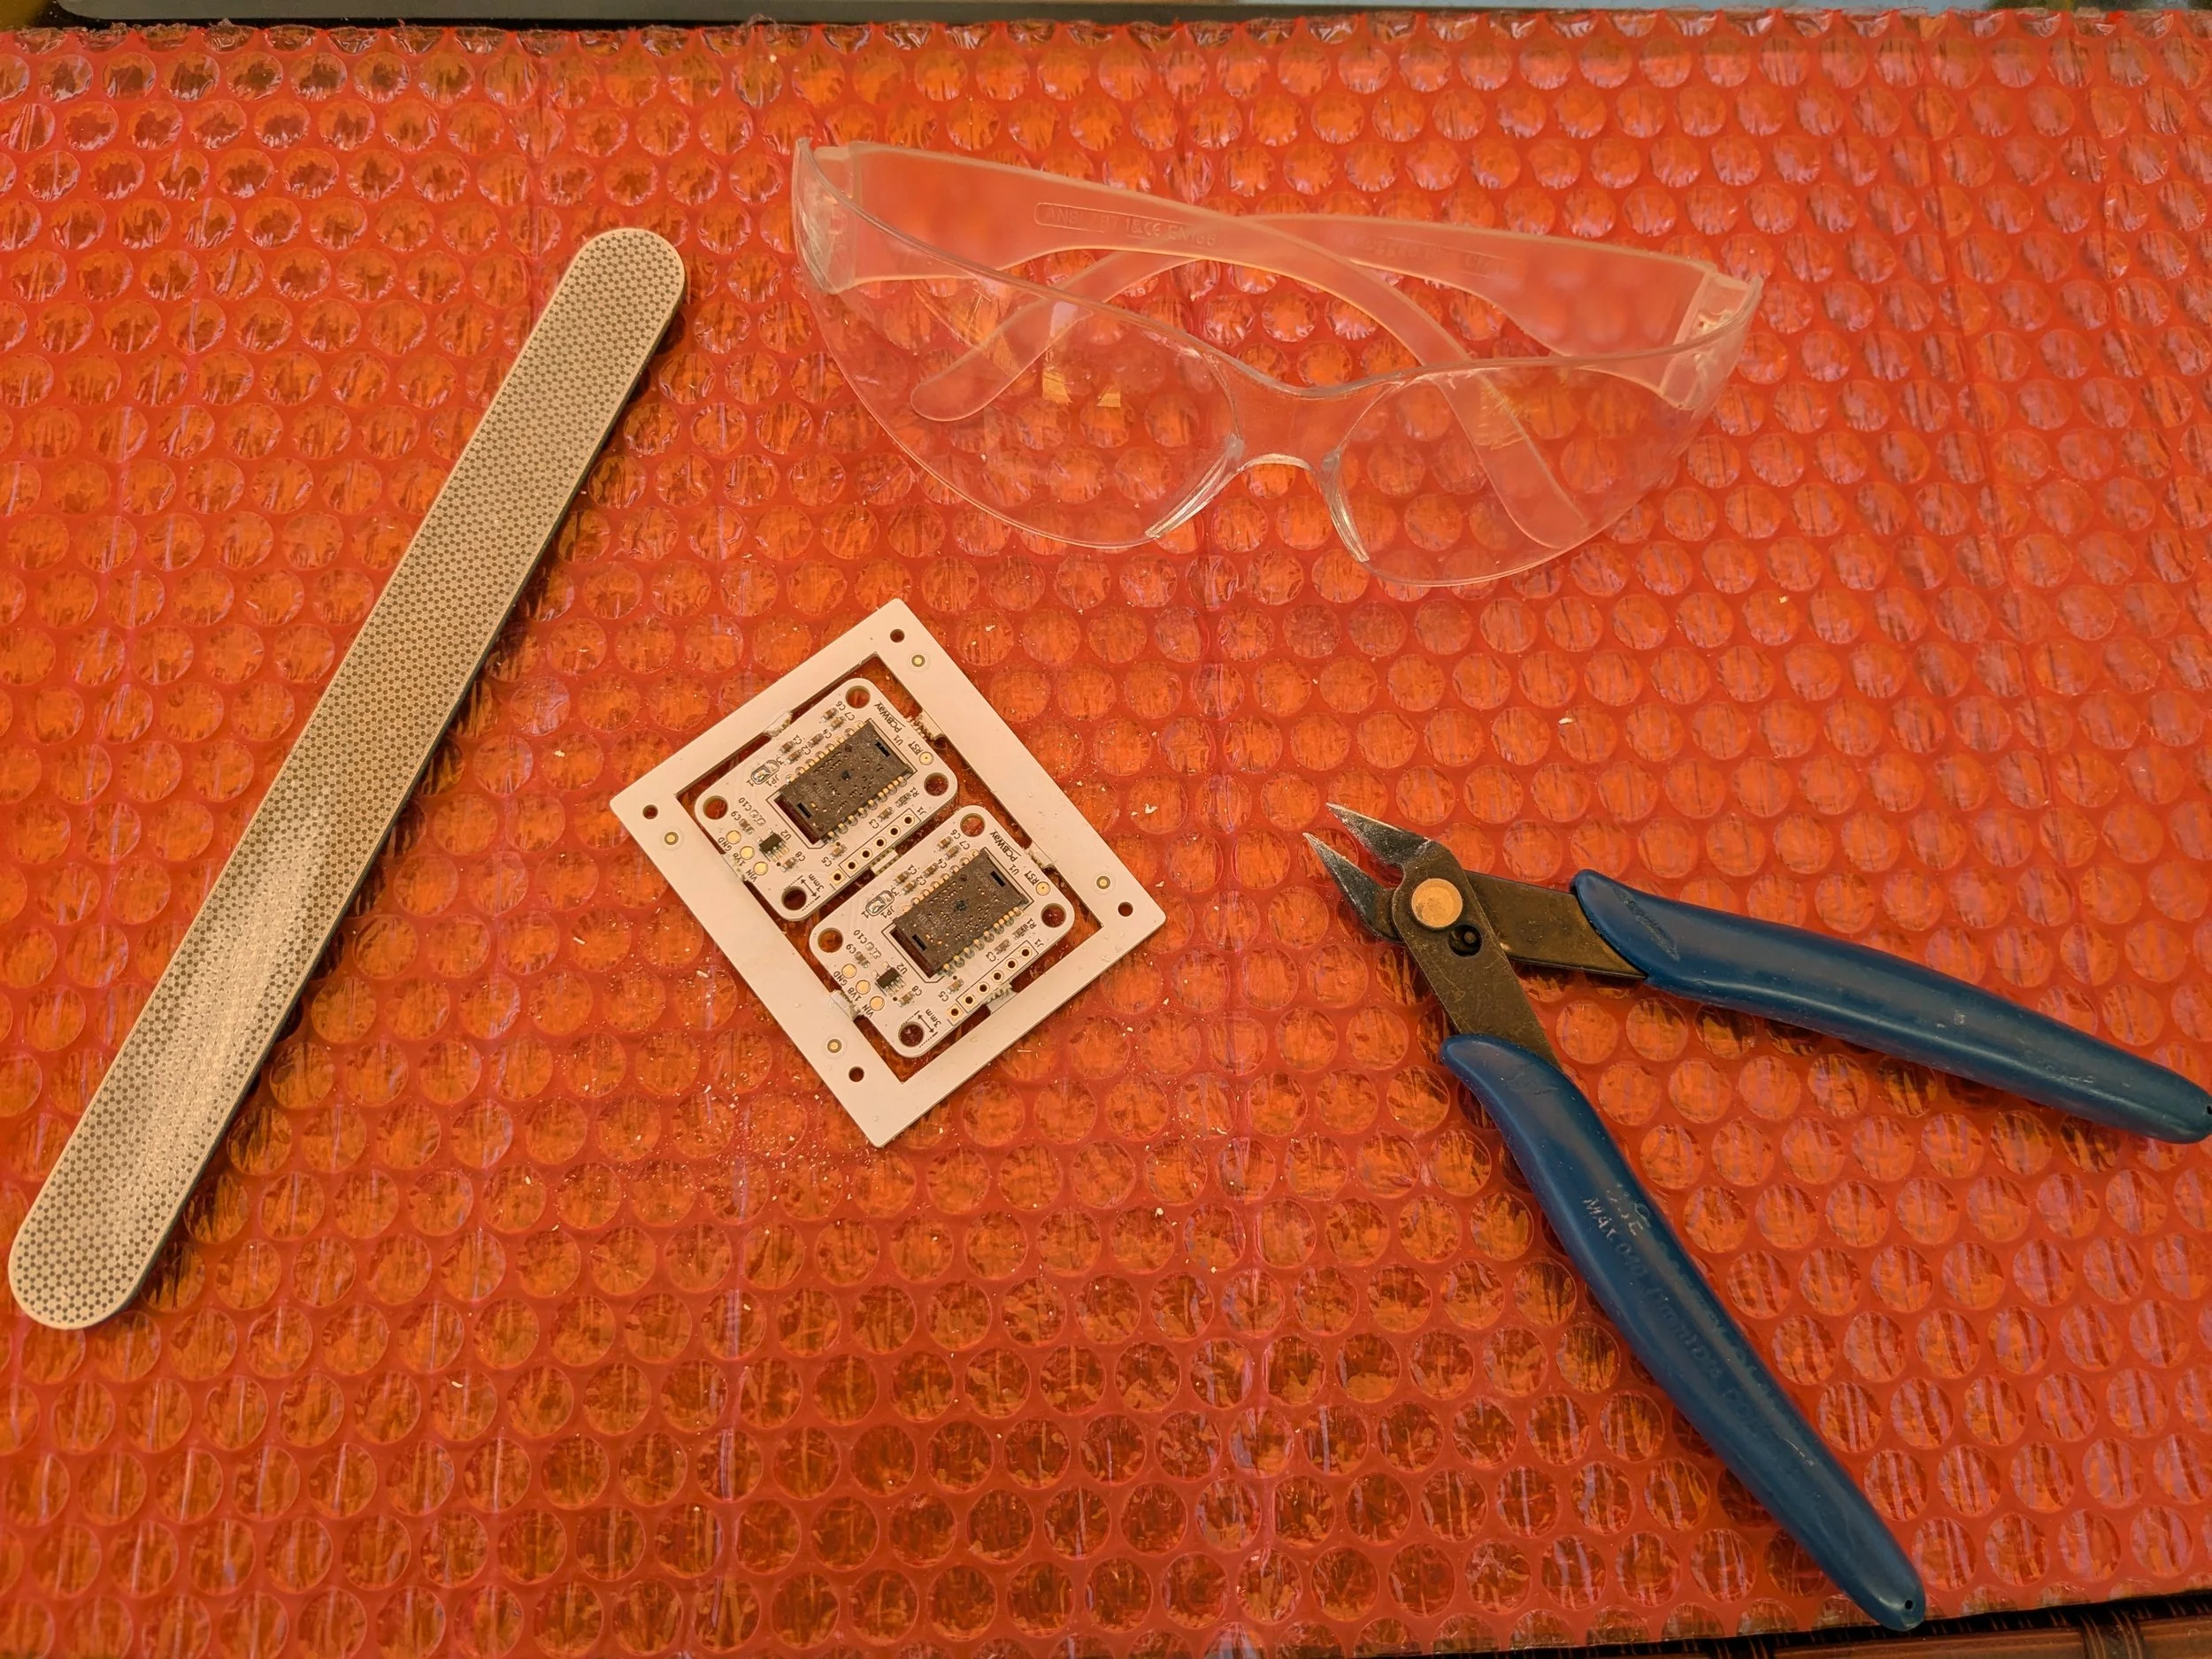
The tools: wire snips, a metal file, and safety glasses (and N95 mask - not shown).
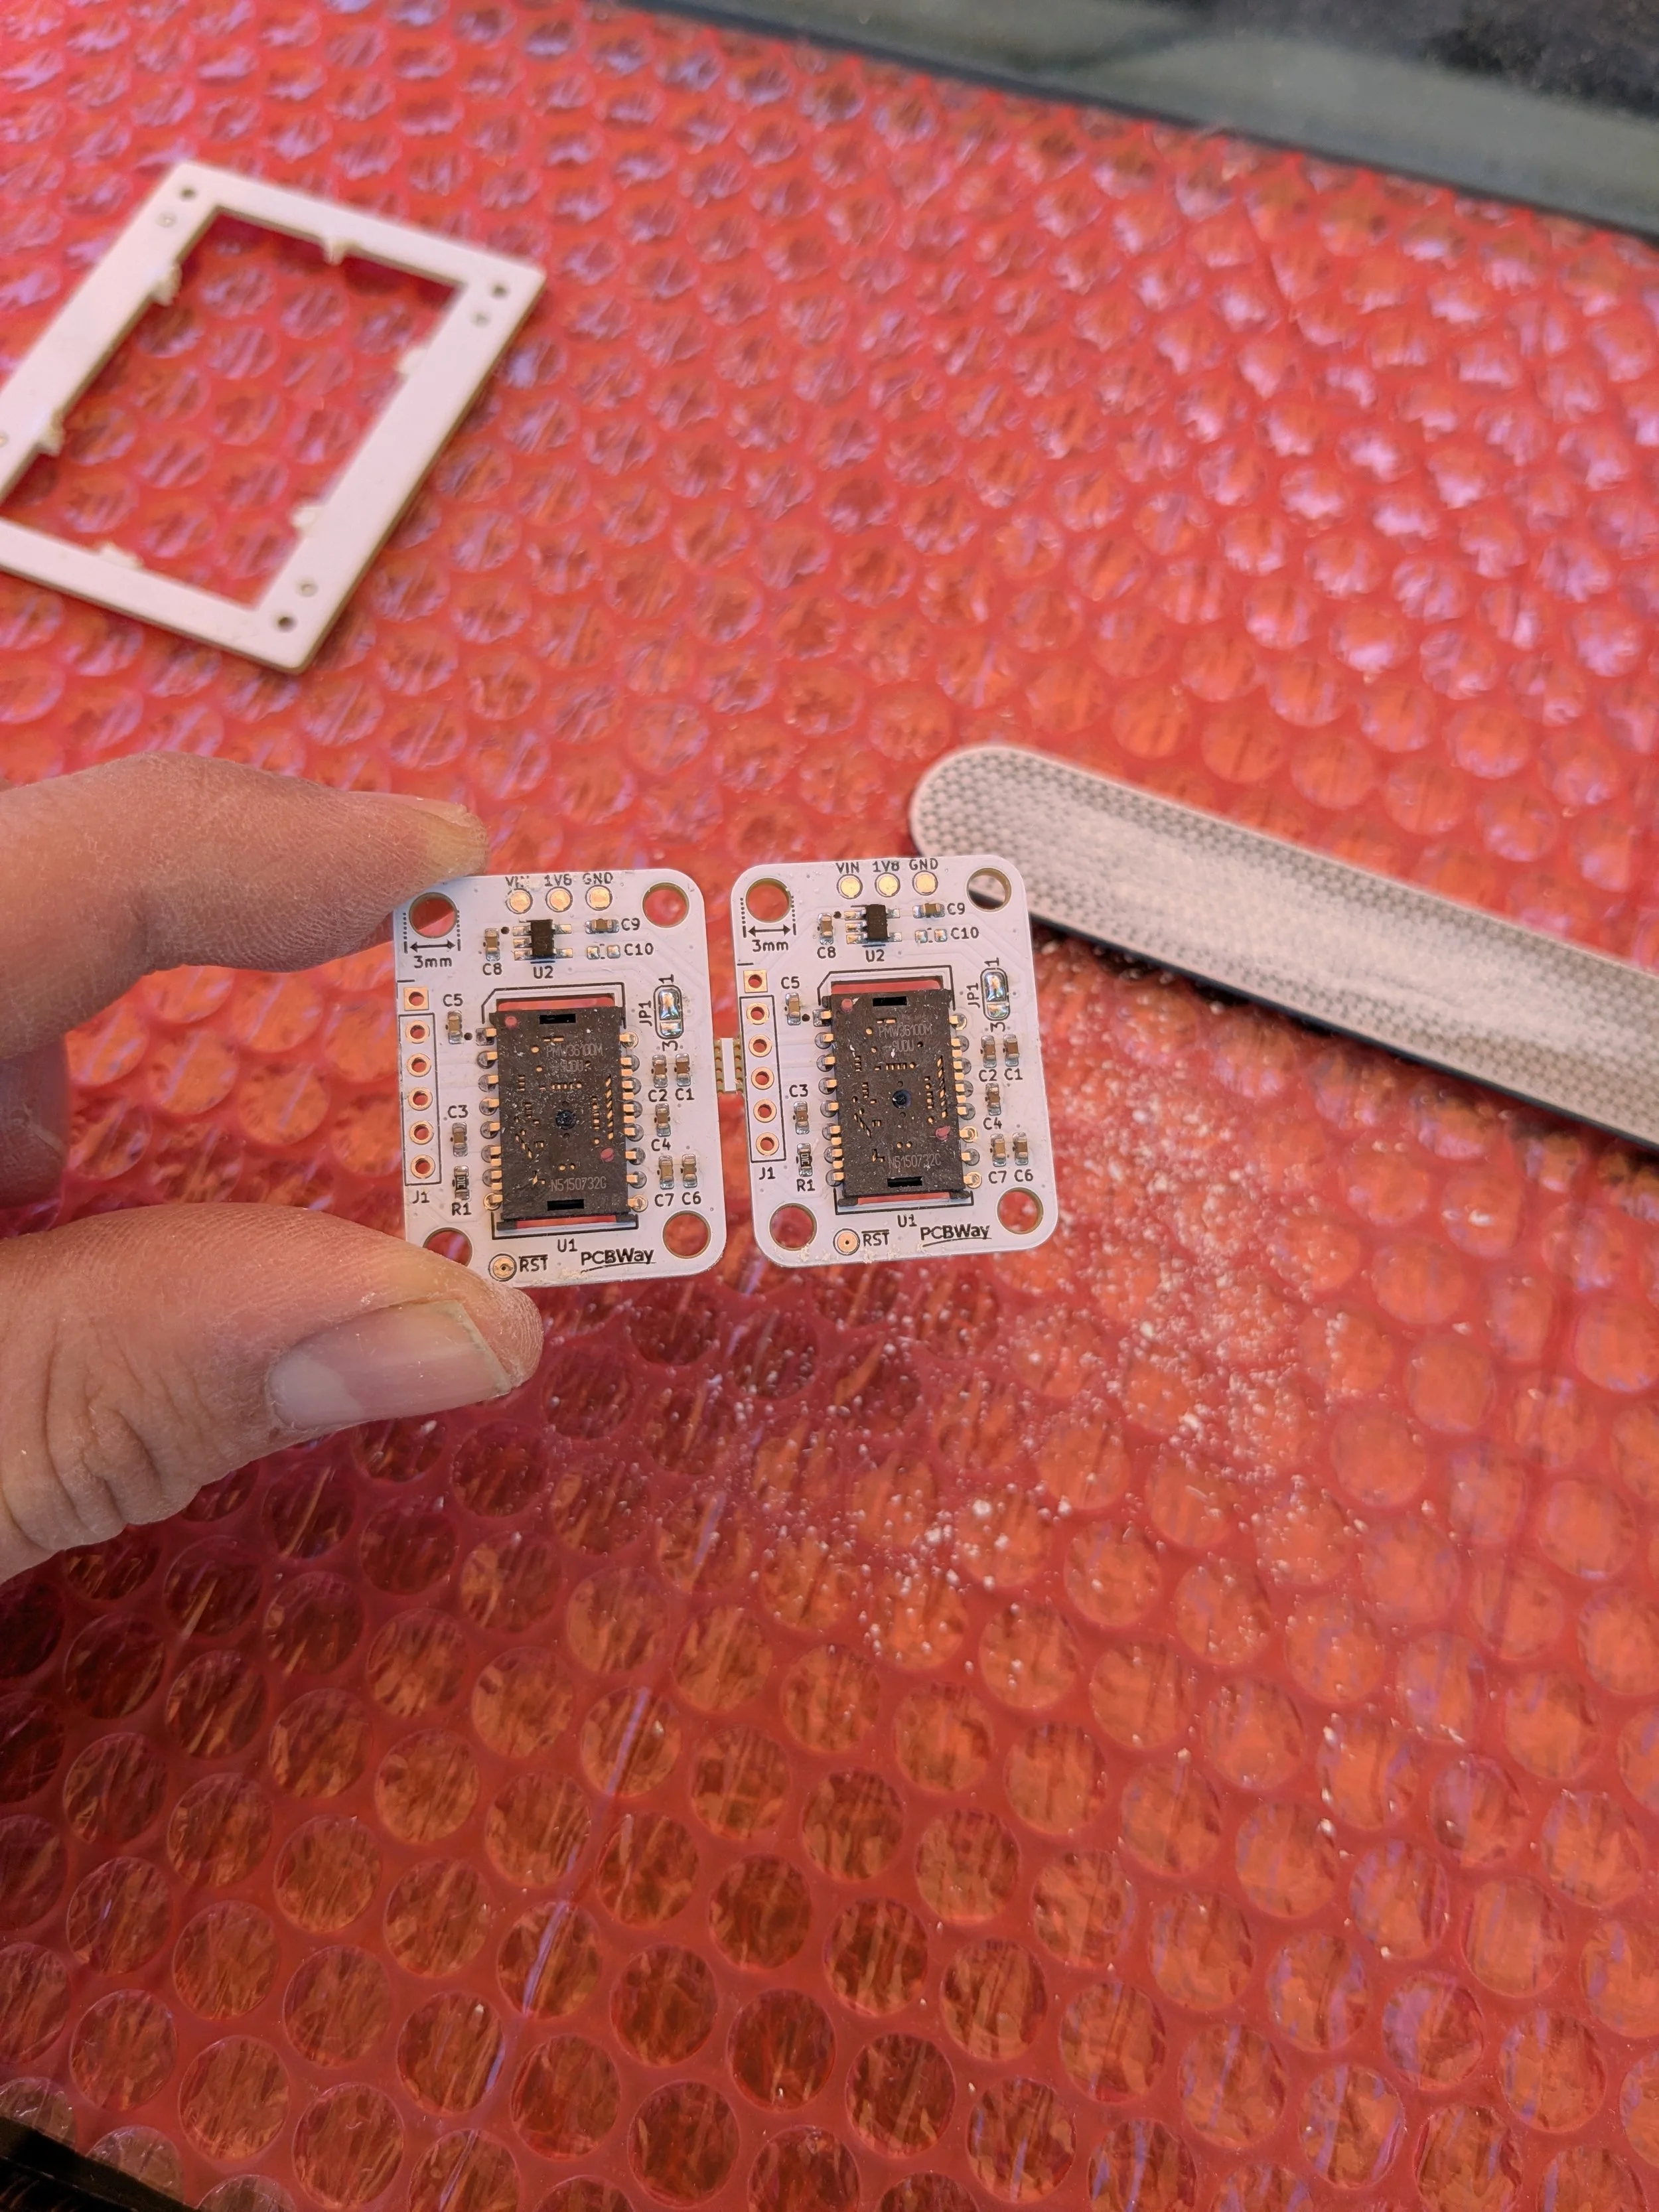
Snip the six breakaway tabs around the edge, then clean up the edges with a file. I did this step outside and used compressed air to clear away the dust.
If you wore your safety glasses, you can use your eyes to admire the beautiful batch of PCBs.
Packaging for Customers
My packaging process is simple but protects the boards during shipping:
Each board goes into an anti-static bag (I regret not ordering extra because each panel comes in a bag, but after depaneling it becomes two units)
Wrapped with bubble wrap
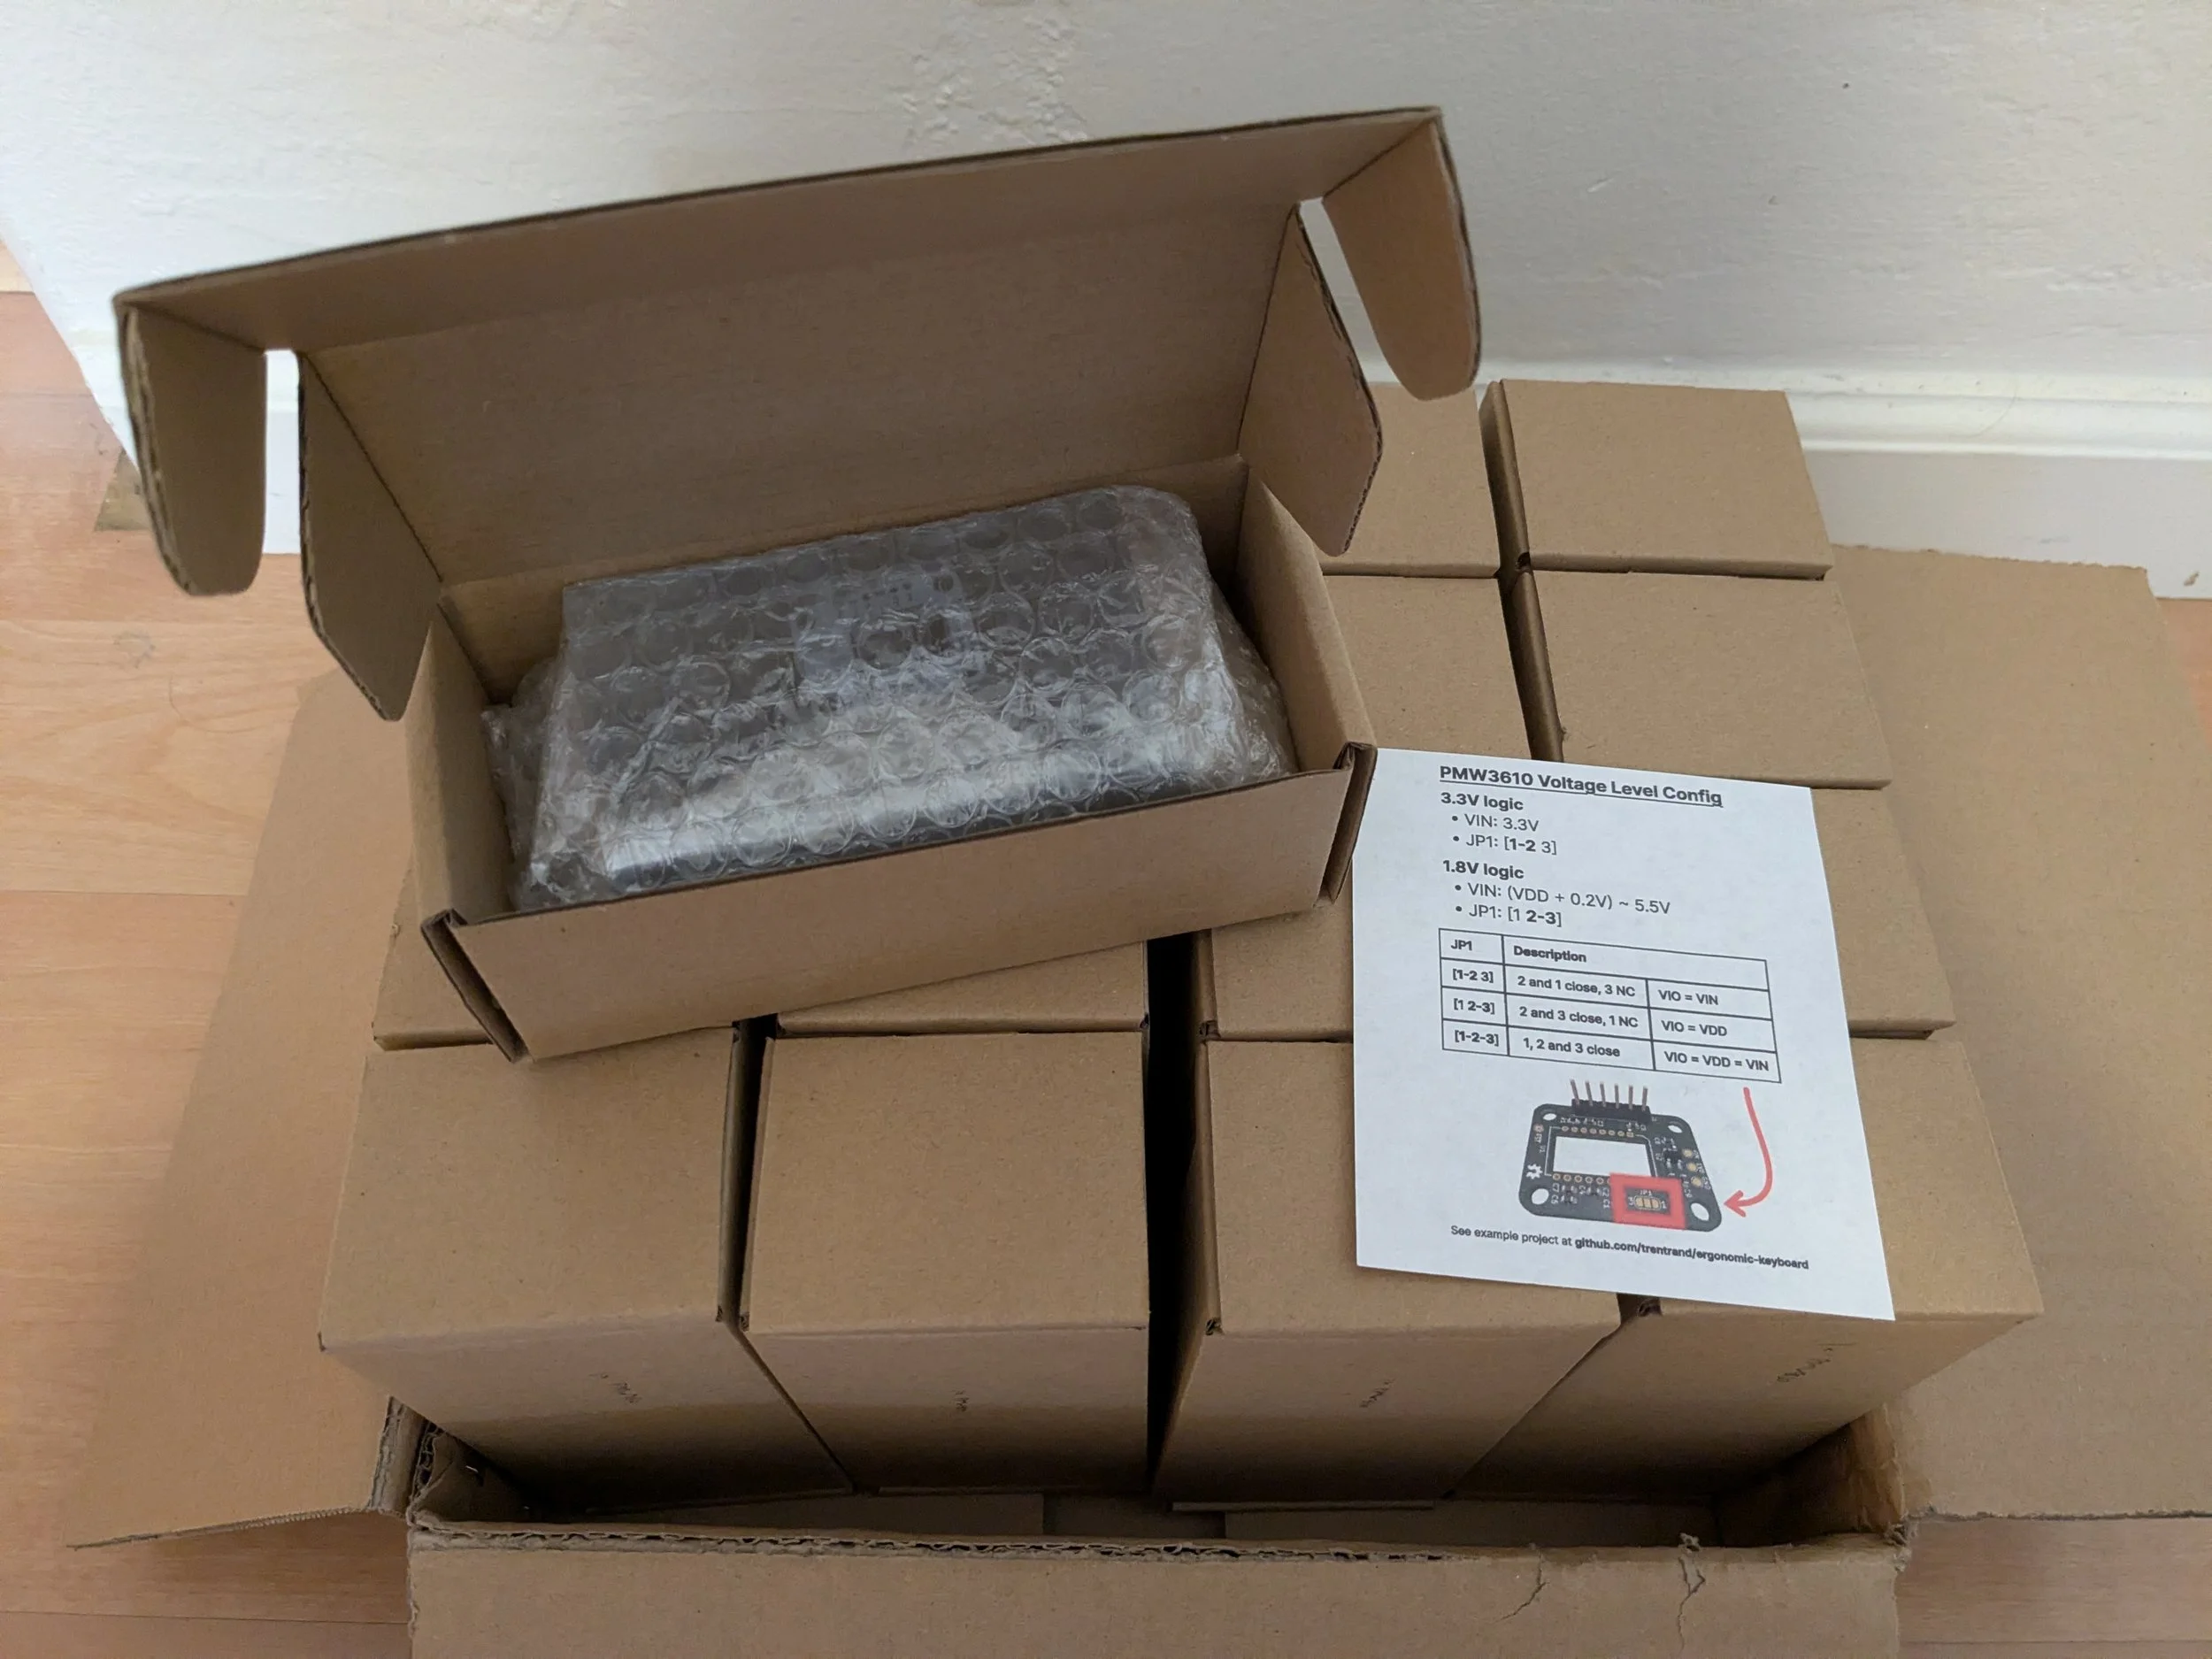
Placed in the smallest box USPS allows (4in x 6in x 2in) along with a printed instruction sheet showing the pinout and wiring diagram
Ready to ship
I have a script that automatically buys labels and prints them after each order. It’s fun to hear the printer brrr - like a legal form of printing money.
The entire process from delivery (to me) to delivery (to you) now takes substantially less time than when I’d hand-solder all these boards. The value of PCBA becomes obvious.
Now that you know how the soup is made, get some metaphorical silicon soup from my shop: https://www.trentrand.com/store/p/pmw3610
P.S. The Alternative Route: DIY Assembly at Scale
I took a hybrid approach with this order. What you saw above + I also ordered 150 blank PCBs and a stencil. This gives me flexibility for a super-cheap future production (if I act like my time is not worth any value).

~150 qty. blank PCBs
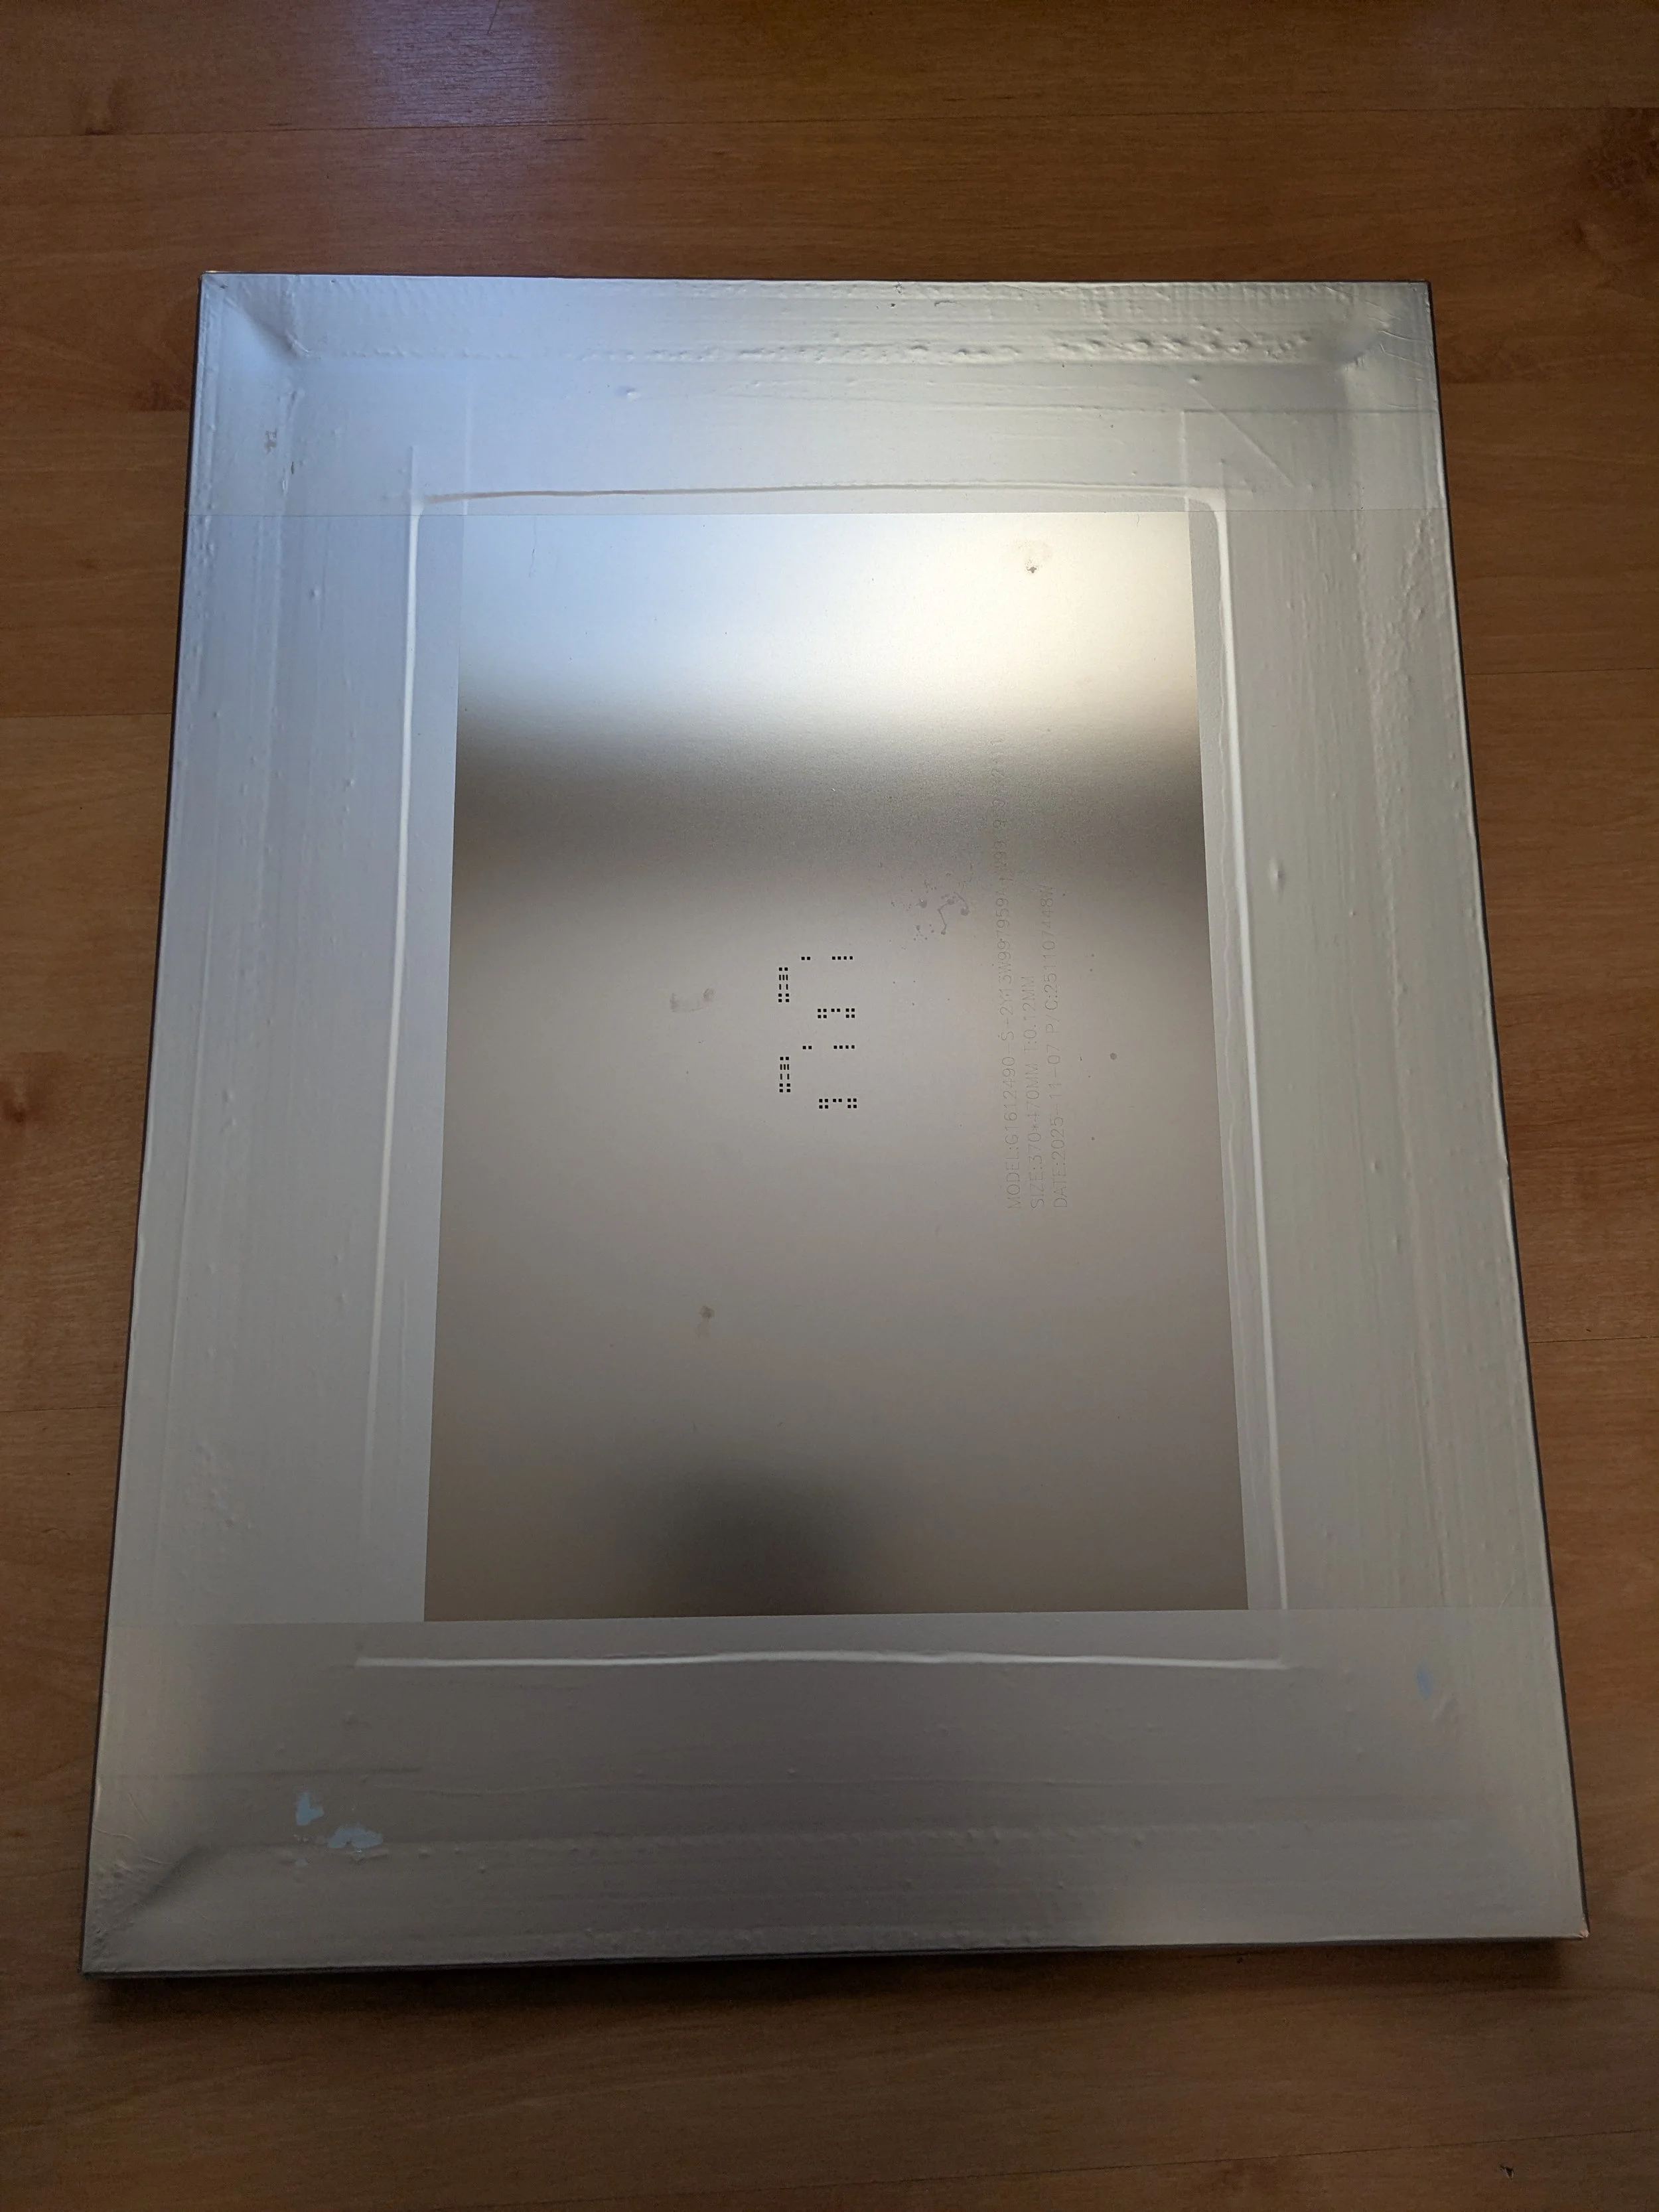
Comically large solder paste stencil 🙃 Modern art.
The DIY assembly route would work like this:
Install stencil into a PCB stencil printer and set alignment pegs for a single panel
Use the stencil to quickly apply solder paste to hundreds of blank PCBs
Place components using a pick-and-place machine (or by hand for small runs)
Run the boards through a reflow oven
Hand-solder the PMW3610 module and lens (remember this from the very beginning?)
This approach offers a different trade-off:
PCBA Route:
Lower profit margin per board
Near-zero time investment
Scales easily - just order more
Consistent quality
Minimal equipment needed
DIY Assembly Route:
Higher profit margin per board
Significant time investment
Requires equipment (stencil printer, reflow oven, etc.)
Quality depends on your skill and setup
Better for learning the process
The time I save by outsourcing assembly is worth more than the extra margin I'd gain from DIY production.
That said, having the blank PCBs and stencil gives me options. I need to justify eventually buying a pick-and-place machine, a stencil printer and a reflow oven (aka a toaster oven from goodwill). These boards will pay for all of the equipment, and then I can rapidly iterate on other low-batch products from my house. Closing the loop on iteration is seriously one of the best and most underrated investments of time and money.
I regret not asking for larger panels (> 2 units per panel), because the stencil is comically large (I chose the standard size) and it’s inefficient to do two at a time.
Working with PCBWay
Overall, working with PCBWay exceeded my expectations. A few highlights:
Communication: They responded quickly to emails and were proactive about asking questions rather than making assumptions. There is no language barrier despite working with an international fabricator.
Turnaround Time: From placing the order to receiving the finished boards took about 3 weeks. There is quite a lot of back-and-forth on the test panel revisions. It was in my benefit, so I found it reasonable.
Quality Control: The pre-production test panel process gave me confidence that the full run would turn out correctly. This isn't something I expected from a relatively low quantity order, but it's apparently standard practice for them.
Pricing: While this particular run was sponsored, I paid using credit so I know what the actual commercial pricing would be. For small-batch PCBA, their rates are competitive, especially if you’re comparing to domestic (USA) fabricators.
Would I Recommend PCBWay? Absolutely, especially for makers transitioning from prototypes to small production runs. The PCBA service is particularly valuable if you're selling assembled products and want to focus on design and customer service rather than manufacturing.
If you're considering PCB manufacturing or assembly for your own projects, you can check out PCBWay's services here. It’s an affiliate link. Thank you. They offer everything from basic PCB fabrication to full turnkey assembly, and their maker sponsorship program is worth exploring if you have an active project with community engagement.
The PMW3610 breakout boards featured in this post are available for purchase at trentrand.com. PCBs are manufactured by PCBWay through their maker sponsorship program.